Radio Boulevard
Western Historic Radio Museum

Rebuilding the R-390A Receivers

Brief History - Assessing your Receiver - Disassembly

The Main Frame - The RF Module - The IF Module

The AF Module - The Power Supply Module - The PTO

Front Panel Restoration - Alignment - Performance

Miscellaneous Info on Variants and Accessories,

Restoration logs for:
R-390A built from Spare Parts, (2)1967 EAC R-390A Receivers
Collins R-648/ARR-41, Collins R-389/URR Detailed Restoration Log
Recreations of Arvin R-725/URR, ASA R-390A,
Clark AB Black Anodized Panel R-390A, USMC OD Panel R-390A


by: Henry Rogers WA7YBS/WHRM

      PART 1 - History, Assessing your Receiver, Main Frame, RF Module, IF Module, Audio Module, Power Supply, PTO, Front Panel Restoration, Meters


     PART 2 - Other R-390A Details, Contractors List, Receiver Alignment, Expected Performance, R-390A Diversity Operation, Building a R-390A from Spare Parts, (2) 1967 EAC Rebuilds


       PART 3 - Recreations of Famous R-390A Variants: Arvin R-725, ASA R-390A, Clark AB Black Anodized Panel R-390A, USMC Olive Drab panel R-390A


       PART 4 - R-389 Restoration - WARNING! This write-up contains "Extreme OCD" detailed information and it's really long, Dynamotor R-648/ARR-41, R-392 Info, Other R-390 Variants, Security Dial Cover, CV-979 and CV-979A Cabinets 


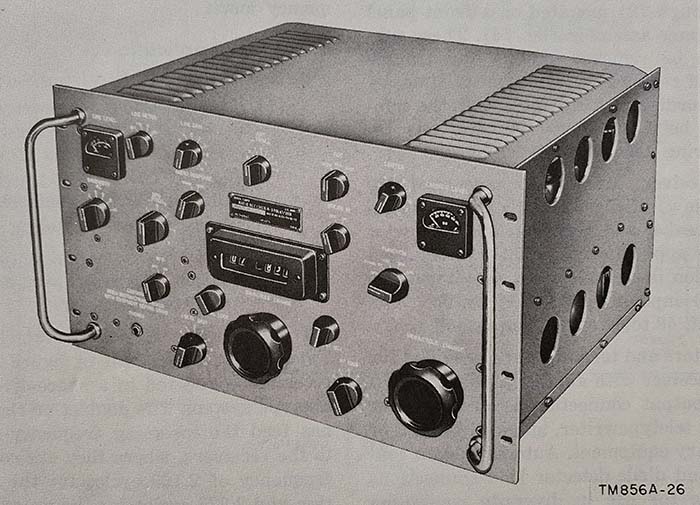
R-390A Receiver artwork from TM11-856A (1956) - Wonder why nobody noticed that the top cover lip was drawn incorrectly. The lip goes over the outside of the side panel like the bottom cover does. Well, it's not the only error in TM11-856A.

The R-390A receivers have always been considered the paragon of electro-mechanical complexity. However, a methodical approach to the restoration of these ultimate performers will ease an otherwise difficult and time-consuming project. This web-article will go through the steps necessary for complete disassembly of the receiver to the individual module level. The thorough inspection and possible problems to look for in the Main Frame and each of the modules will be covered with individual sections. Additionally, photographs of typical problems I've found are included in each module section to illustrate what to be on the lookout for. I've written this rebuild article in easy-to-read "tech language" and have tried to keep all of the procedures and rework easy and not requiring any exotic-type test equipment or tools. With careful attention to detail and a thorough approach to the rebuild and alignment the technician-enthusiast will be rewarded with being able to operate one of the best performing vacuum tube receivers ever designed. - Henry Rogers - Feb. 8, 2012

PART 1

A Brief History of the Design

R-390/URR  - Arguably, the R-390/URR and its later kin, the R-390A/URR, are the ultimate tube-type receivers. The first version of this incredible receiver was the R-390 featuring 33 tubes (includes the 3TF7 ballast tube,) double or triple conversion, two RF stages, six IF stages, modular construction, three audio filter settings, six selectivity bandwidths and frequency coverage from 500 kc. to 32.0 mc. in 32 - one megacycle wide - bands. It is a high performance receiver that really "shows its stuff" when conditions are poor but will also provide fairly nice audio quality when receiving conditions allow for it. The most common complaint is the cumbersome tuning that, while "parked" on one frequency is not apparent, shows up when spanning an entire band or changing ranges. Most of the "stiff tuning" complaints can be traced to an over accumulation of grease and dirt in the gear train. When clean and properly (lightly oiled) lubed, the tuning is very light and easy to manipulate. Only Collins or Motorola built the R-390 contracts which ran from 1951 through 1953. The military complained that the R-390 was very difficult to maintain and too expensive. Some of the maintenance issues involve the R-390's elaborate electronically regulated B+ circuit that uses two 6082 tubes along with two 5651 voltage reference tubes and a 6BH6 DC Voltage Amplifier tube. This circuit runs quite hot and accounts for many of the problems that develop in the audio module (where the regulator circuit is located.) Additionally, the R-390's gear train has a moveable "locking gear" that must be installed prior to removing the RF module (if you want to keep everything synchronized.) This gear was painted green and usually mounted with a screw on the front of the gear box. Each time the RF Module is removed and then replaced on an R-390, the KC and MC drive shaft split gears have to be reset for backlash, the Crystal Oscillator module's bandswitch has to be synchronized and the oldham coupler installed. Removal of any of the crystals in the Crystal Oscillator module requires removal of the hard-wired crystal oven. When the military complained about complex maintenance issues, they weren't exaggerating.


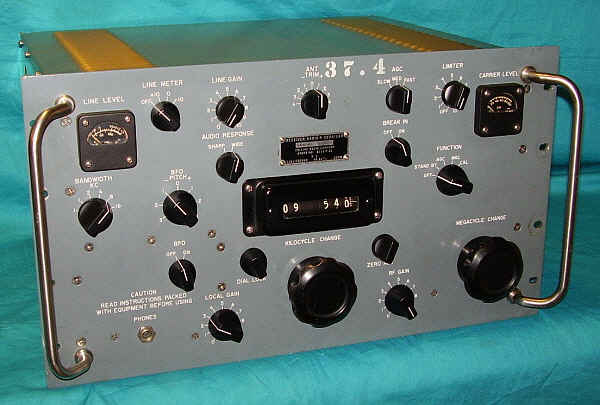
photo above: 1951 Collins R-390/URR Receiver in CY-979/URR table cabinet


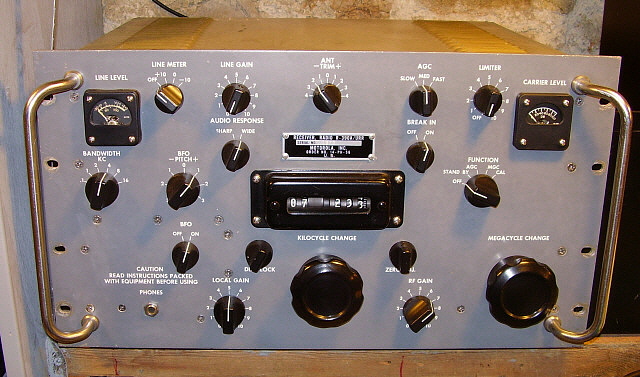
photo above: Collins contract R-390A from 1955

R-390A/URR - Collins designed a replacement receiver that was introduced in 1954 with the designation of R-390A/URR. Though the new receiver looked very similar externally to the R-390, inside numerous changes were made to improve cost-to-performance and ease of maintenance. The new receiver's gear box was removable as a unit and synchronization would be maintained, the crystal oven just plugged into the Crystal Oscillator module (it is secured by screws though,) the B+ voltage regulator circuit became a standard 0A2 tube, the crystal calibrator was combined into the RF module (eliminating the separate Crystal Calibrator module of the R-390) and the Crystal Oscillator module was mounted to the RF module so removal of the entire RF deck kept everything synchronized together except the PTO. All of  the maintenance "quirks" of the R-390 were corrected in the R-390A which made the receiver easy for the military to maintain. The major performance change involved the installation of four mechanical filters in the IF section of the receiver. The steep slopes of the mechanical filters gave the R-390A excellent selectivity on 16KC, 8KC (really about 11KC,) 4KC and 2KC bandwidths. The 1KC and .1KC bandwidths are crystal filter derived from the 2KC wide setting.

The R-390A uses 26 tubes (including the 3TF7 ballast tube) with one RF stage, four IF stages, mechanical filters on four of the six selectivity positions, plus an 800Hz audio filter. When properly set-up, an operator can dig right through the QRM while maintaining fantastic sensitivity making the R-390A one of the finest tube-type receivers ever built. The R-390A was produced in yearly contracts from 1954 up through 1967 (and some very small contracts in 1968 and 1984) with many different contractors building the receivers during those years. Though the R-390A's six modules and redesigned maintenance approach made field repairs much easier, it was still a complex receiver that required experienced technicians to maintain. Though the military wanted a less expensive receiver, it certainly wasn't that either.  >>>

 >>>  The R-390 and R-390A receivers have provided reliable communications and allowed intelligence gathering surveillance under adverse conditions for years. Even though the design and all of the receivers are over 50+ years old, they are still one of the best tube-type receivers around. Many R-390 and R-390A receivers are still being used today, some in professional applications, but also for serious SWLing and, of course, in vintage military radio ham stations around the world.

However, many of the R-390 and R-390A receiver in operation today are being used with all original parts and have not been serviced with the attention necessary for a receiver that is over half of a century old. Although most R-390As will probably operate pretty well on all original parts, many early versions will have some paper dielectric capacitors exhibiting leakage current. These "leaky" capacitors can alter original bias voltages, cause excessive current flow and possible overheating in some resistors and inhibit the great performance that the R-390A is capable of. Replacement of the older style molded capacitors and the "Vitamin-Q" style paper dielectric capacitors is recommended for top performance and reliability.

The only module in which the replacement of these capacitors is a challenge is the IF module. This is due to the compactness of the unit and resulting component density. The AF module and the RF module also have capacitors that should be replaced but these are very easy to access and replace. The Power Supply module and the PTO don't have any paper capacitors in their circuits. Late versions of the R-390A, those built in the 1960s, have ceramic disk and film capacitors that generally are trouble-free.

The AF module on all versions will have two multi-section electrolytic capacitors. On ALL versions of the R-390A, these two multi-section caps are 50+ years old. They may reform but don't be surprised if one section doesn't. For best performance you need a stable power supply, so these two multi-sections should be rebuilt with new electrolytic capacitors or you can buy newly-created replacements.

After the rework, a thorough check-out to find all of the component related operational problems and a complete examination of all of the vacuum tubes that includes replacing any tubes that test less than "almost like new" should be performed. The receiver will then need a full IF/RF alignment. Afterwards, the R-390A will be functioning at or better than its specified performance level.


photo above: 1956 Motorola contract R-390A with silk-screened front panel nomenclature and long data plate


The R-390 and R-390A receivers have earned a reputation of "the best vacuum-tube receivers ever built" but to achieve this level of performance you'll need to "dig into" your receiver. It's a time-consuming project but it really is necessary if the legendary R-390A performance is to be attained.

Assessing Your R-390A - What Really Needs to be Done

How Far to Go with Your Rebuild - There are at least two types of rebuilding approaches that can be taken for this question. First, there are the users that believe you should operate the receiver with all original parts. This certainly comes for the fact the most "well-cared-for" R-390As will function pretty well with all of the original capacitors. After all, cost was no object when the receiver was built and the best capacitors available at the time were used in its construction. The second group of rebuilders believe that even though the capacitors were the best available, they are now over half-a-century old and must be exhibiting some leakage current since most of the early receivers used paper dielectric capacitors. These rebuilders point to the brown-body, molded capacitors (likely Sprague manufacture) used in the early RF modules and the IF modules as examples to be wary off. These molded capacitors are similar to "Black Beauty" types but seem to be higher quality.

RF modules and IF modules built from the early-1960s and later will probably not have the molded capacitors. These modules have capacitors that appear to be film-type caps are installed instead. The latest versions built in the mid-to-late-1960s will have ceramic disk and film capacitors that generally don't need to be replaced. However, on the receivers built in the 1950s, nearly all of the capacitors are paper-dielectric. The more diligent rebuilders also point out that even the Sprague "Vitamin-Q" capacitors are also paper dielectric types. Sprague did produce the best capacitors at the time, however all contracts didn't use the same manufacturer for capacitors (probably due to cost) so later modules will have similar style capacitors built by Sangamo or General Instruments. It doesn't really matter because all of that style capacitor will have paper as the dielectric material which is "the problem." Today's capacitors that are used for rebuilding are "self-healing," metalized-film types that use a plastic dielectric material such as polystyrene or polypropylene. These new capacitors will function with no problems for many decades.

When considering the type of rebuild, of course, the condition of the R-390A itself has to be taken into account. A poorly stored 1955 contact Collins version is certainly going to have more problems than a never issued 1967 contract EAC version (maybe.) However, most of the R-390A receivers we run into are from the former category - poorly stored receivers that have many obvious and also many latent problems. I have to admit that for many years I believed that any R-390A receiver could be operated with all original capacitors and performance was at the receiver's design level. The acquisition of two poorly stored examples, a 1961 Capehart and a 1956 Motorola, and my subsequent rebuilds of those receivers changed my mind. I rebuilt the 1961 Capehart and didn't replace the paper capacitors. It worked and seemed at first listening (after alignment) to be a pretty good performer. The 1956 Motorola was carefully and thoroughly rebuilt including replacement of all the paper capacitors. With the Motorola I was able to reduce the IF GAIN down to 50% while maintaining sensitivity that allowed copy of SSB stations on 40M with the RF GAIN at 5. Its performance is "light-years" ahead of the Capehart. The dramatic difference between the two rebuilds leaves me with no doubt - if the receiver has seen a lot of use and was poorly stored for years, the best performance can only be achieved with the replacement of all the paper capacitors. But, most important in the rebuilding process is a thorough and meticulous mechanical rebuild, installation of NOS or "test-as-new" tubes and most important for "top performance" is careful RF/IF receiver alignment performed with quality laboratory type test equipment.

One note on the multi-section electrolytic capacitors that are found in the AF module. As these units age it becomes more and more unlikely that they will successfully reform. I recently (2016) tested all of my spare R-390A multi-sections and found that ALL of them had problems and were not useable. These originals are all over fifty years old and the failure is that one section out of the two or three sections will be defective while the remaining capacitors seem to reform. At any rate, the units are not usable and have to be rebuilt. I now recommend that the two multi-section capacitors be rebuilt with new electrolytics as part of any R-390A rebuild. There is a section further down this page that describes the electrolytic capacitor rebuilding process. Also, in 2022, KE9PQ offers newly made replacement filter electrolytic capacitor for the R-390A for about $120 for the two required.

Experience and Rework Ability - The R-390A is a complex receiver that will require a fairly high level of experience to successfully finish a complete tear-down, rebuild, reassembly and alignment. Though the receivers used the best parts available and were built by some of the best contractor companies over the years, they aren't impervious to damage from poor storage, abuse or incompetent (or indifferent) technicians. If you choose a candidate that's in pretty good shape, you won't run into too many problems and a thorough inspection of all of the modules will probably find all of the operational issues. To complete a project that involves a "storage challenged" receiver you should be fully experienced in complete disassembly and reassembly of electronic equipment. You should be fully experienced in troubleshooting, repair and alignment of complex receivers. You should be able to keep track of multiple assemblies and parts, along with the project's progress over a fairly long time period. You should have first-class soldering equipment, use real SnPb solder and possess good technician skills and habits. You should have laboratory quality test equipment for troubleshooting and final alignment. You'll need a quality mutual conductance type tube tester or at least access to one. The R-390A won't function at its best unless all of tubes "test as new." Most of the people that rebuild and recondition R-390 and R-390A receivers are experienced from the military or from professional commercial electronics work. If you are a reasonably experienced technician and are thorough, careful, methodical and take your time, then you can easily take on the reconditioning or restoration of one of these great performing receivers. Manuals - The Army TMs are excellent for procedures and circuit descriptions. Try to find a TM that is relatively close to the year of the contract of the receiver being worked on. There are several errors in any manual and some are obvious while others are so subtle they were never corrected. The Army seemed very reluctant to update the schematics. You will find many conflicts in any receiver versus what the TM shows in the schematic component values. Most of the time the component in question will have "NOTE" with numbers to guide you to the upgrade that changed the value. Most of the time, the upgrades are listed in separate papers that might be included in original manuals and might be included with modern copies of manuals. Also, some upgrades were issued MWOs to incorporate into receivers that entered into the repair cycle. MWO lists are also on separate papers that might or might not be with the manuals.

The Navy also had manuals for the R-390A. The Navy manual I have is dated 1971 so it's quite a bit newer than my newest Army TM which is from 1961. The Navy manual is difficult to use for procedures but very good for schematics and updates. It may just be a factor of the newer Navy edition I have but component value changes are shown on the schematic plus there's a note referencing a table with a list of upgrades that shows when the upgrades were incorporated into production contracts. But, like typical Navy manuals, navigating through the book with its cumbersome layout and quirky procedures is a real task. The best solution is to have several versions of the manuals, both Army and Navy. Also, on the Army TM, a "Field and Depot Repairs" manual is also helpful.

Disassembly will be Required - The only way to inspect everything is to disassemble the receiver down to the main frame. This means you will have to remove the Power Supply module, the Audio Module and the PTO from the bottom of the Main Frame. The IF module and the RF module have to be removed from the top of the Main Frame. Before removing the RF module you must remove the front panel. When inspecting and cleaning the individual modules more disassembly will be necessary. On the RF module, each of the 18 plug-in RF coil assemblies need to be removed to check the condition of the pins and pin sockets. Corrosion is common in these areas in receivers that were stored in humid areas. There are also six plug-in coil assemblies in the Variable IF conversion section that also need to be removed for inspection. The more thorough and meticulous your inspection is, the more actual and potential problems will be found. Thorough Cleaning Required - This is not only cleaning the obvious dirt and grime but elimination of the corrosion that turns up in R-390A receivers that have been stored in areas that are exposed to the temperature fluctuations and humidity of garages or sheds in some areas of the country. Corrosion in the many plug-in sockets in the receiver (not only the 26 tube sockets but the 24 plug-in coil sockets and the 15 crystal sockets not to mention all of the interconnecting cables' sockets) will cause anything from non-functionability to erratic changes in sensitivity or signal level. De-Oxit applied with various kinds of tools is just about the only way to start the corrosion removal process. Usually, some rubbing of the De-Oxit with Q-tips, wooden toothpicks, small brushes and even plugging tubes in and out of the sockets will be required to remove the corrosion. Be careful not to remove the gold plating that is on the pins and sockets by using wire brushes or other brutal methods. This was the corrosion protection but gold plating is thin and somewhat porous and over time corrosion will appear in humid environments. Sometimes corrosion removal will require the use of wire brushes but only as a last resort. Most of the underneath of the various module chassis are in good condition since they are well protected but a thorough inspection is still required of every part of the circuitry, especially in receivers that show obvious corrosion problems above the chassis.
Remove all Modules for Access to the Main Frame - The R-390A must be stripped down to the Main Frame. This will require removal of all of the modules. The modules are mounted using "captive screws" that have the screw heads painted green. There are also various interconnecting cables that need to be disconnected. The small coax cables with BNC Jr. connectors are all marked with metal tags for identification. When removing the RF module you will find that the front panel has to be dismounted. Also, there are four captive screws and seven other screws that mount this module that are not captive screws but they will (or should) have the screw heads painted green. Be sure when removing the PTO to set the receiver to XX.000 on the Veeder-Root counter (MC doesn't matter but KC does.) After removal don't move the PTO shaft unless you have marked a reference line on the shaft. Otherwise, you'll have to synchronize the PTO to the RF module when reassembling. This isn't difficult and if you're going to be working on the PTO, it doesn't matter because you'll have to synchronize it anyway. Once all of the modules are removed you'll have complete access to the Main Frame to begin the rebuilding process. Removing all modules except the RF module can be accomplished without dismounting the front panel. Front Panel Dismount and/or Removal - If you don't need to do any cosmetic work to the front panel and the Main Frame of the R-390A is also in good condition but you want to work on the RF Module, you'll have to dismount the front panel. Remove the Kilocycle and Megacycle knobs and the Ant Trim knob. Remove the Dial Lock knob and loosen the mounting nut so you can turn the clamp off the the locking disk. If you haven't removed the IF module, then loosen the shaft clamps on the BFO and BANDWIDTH controls and pull the knobs and shafts forward. Remove the eight 10-32 FH screws that mount the panel to the side panels. Remove the five 6-32 FH screws on the front panel that have conical lock washers underneath. Remove the mounting nuts for the two large shaft bushings for the MC and KC tunings and push the rear bushing back so it isn't though the front panel. Do the same on the ANT  TRIM shaft bushing. You should now be able to pull the front panel forward off of the shafts and lower it face-down in front of the Main Frame. If the front panel can't be pulled forward enough to clear the shafts, loosen the green head screw behind the front panel that holds the clamp for the main cable harness. This should allow you to pull the front panel further forward to clear the shafts. You can now remove the six remaining green head screws and loosen the four green head captive screws on the RF Module. Disconnect all of the coax cables and the PTO cable from the RF Module. Lift the RF Module out of the Main Frame.

Front panel removal will require the steps mentioned in the paragraph above plus removing all of the remaining knobs and dismounting all of the controls. The phone jack will also have to be dismounted. The PC board above the dial cover has to be dismounted. You have to remove the data plate since the screws for the PC board are behind the data plate. Remove the 6-32 FH screws that mount the clamps for the wiring harnesses. You'll have to unsolder the leads to the Carrier Level meter and the Line Level meter. Now the front panel can be entirely separated from the Main Frame. This operation would be required if serious cosmetic work was necessary on the front. If that's the case, you'll also have to dismount the two meters, the dial cover and the two large handles from the front panel.


Restoring the Main Frame

Though this really doesn't seem like it would need much attention several important functions are located on the Main Frame. First, all of the chassis ground connections are through the main frame. Good, clean connections are necessary for all of the modules to work together. Unless the Main Frame is in really good condition, I recommend that the Main Frame be totally disassembled for cleaning of all of the panel to bed plate contact areas. It's surprising how much dirt and corrosion can get into these areas. Check for the proper screw lengths during disassembly. It's common to find different length screws installed for the side panel to bed plate mountings due to indifferent reassembly in the past. All bed plate screws should be 1/2" long and mounted with lock washers. The smaller panels on the underside are mounted with screws that are the correct length to not protrude through the pem-nuts on the topside. Be careful on reassembly to use the correct screws and washers. Look at the side panels and make sure no damage has occurred to the rear part. It's common to find this area of the side panels bent from placing the receiver "face up" on its back. While the side panels are off is a good time to straighten any mechanical problems. The back panel will need a lot of attention because of the terminal strips, the AC power cord input cover, fuse holders and other parts mounted there. Check all of the connections to the rear of the terminal strips for broken wires or other problems. Reassemble the Main Frame using the proper length screws with lock washers. Don't over-torque the screws but make sure they are fully compressing the lock washers. Be sure to install all of the screws required - they're there for a reason.

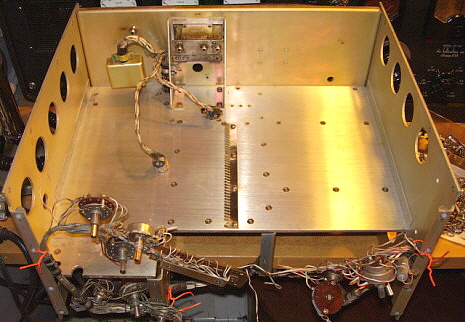
photo right: This shows a completed Main Frame for the 1956 Motorola contract. Note the orange twisted wire in the photo. These wire ties are installed just to keep the harness from "flopping around" until the front panel is re-installed. For minor cleanup of the Main Frame the front panel doesn't have to be removed, it can be dismounted and will lay down flat with the harness and controls mounted.

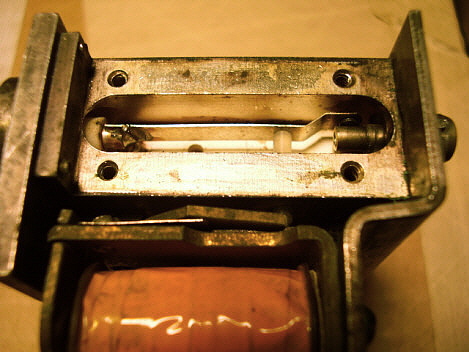
Checking the Antenna Relays - Some users of the R-390A aren't aware that there are two antenna relays that disconnect the Antenna Input from the receiver (and connect the Antenna Input to chassis) while in Stand-By and when Break-in is in operation. The Antenna Relay assembly is mounted to the rear panel on the inside. There is a gusset that adds strength to the mounting and protects the BNC connectors and the relay coils on the inside. The relay coils operate on approximately +20vdc. Even though the Antenna Relay Assembly is well protected, they are silver and gold plated and seem to be subject to a lot of oxidation. Normally, silver oxide is quite conductive and not an electrical problem but occasionally enough moisture gets into the relay arm area and causes some sort of non-conductive oxidation. You should check the DC resistance from the Balanced Input to the two BNC outputs and from the Unbalanced Input to its single BNC output. Without the relays energized, you should have no resistance (zero ohms.) When the relays are energized, these points will show an open circuit. Relays energized should also now show the Antenna Balanced and Unbalanced Inputs connected to chassis. If you show some resistance then oxidation has formed inside the relay arm area. Remove the side covers to expose the relay arm on each side of the assembly. These screws have green Lok-tite applied during assembly so you'll have to use a soldering iron to heat the screw to weaken the Lok-tite and then loosen the screws.

See the photo to the left. It shows a relay arm that reads 50 ohms of DC resistance when in NC. You can see that the contact on the arm is black and the brass (gold-plated over brass) barrel of the BNC is also discolored somewhat. I cleaned the contact area with DeOxit applied with a saturated paper pulled through the contacts. This wasn't enough. I had to clean the oxidation using 400 grit aluminum oxide paper. I then used a small paint brush to further clean the area with DeOxit. After this treatment the contact resistance was zero ohms for both relay states. Although the Twin-ax connections did measure zero ohms in both relay states, I gave those contacts the same treatment as a problem preventative measure.


Restoring the RF Module

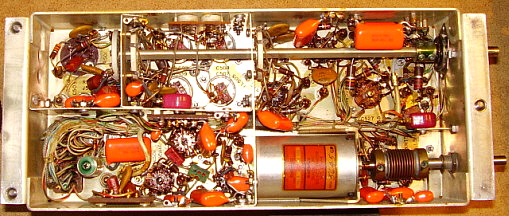
Certainly the most complex and difficult to work on module is the RF module. All of the gear drive is located here along with the slug racks, the RF coil assemblies, the Crystal Oscillator and the Calibration Oscillator. However, be patient. It's unlikely you can completely finish the RF deck in one day. It will take several days since there are always so many problems lurking about in this module. There are several subsections to follow due to the numerous functions that this module performs.

Cleaning the Gear Box with a "Flush and Brush" - If the RF Deck is in pretty good shape and the mechanism does move without binding then usually just a good flush will clean up all of the years of spray on grease and other abuses that were typically applied to this robust gear train. Use a full can of WD-40 along with a long handled paint brush with a 1/2" wide brush and an acid brush that the handle is slightly bent. I perform the flush outside since an entire can of WD-40 is going to be flushed through the gearbox. You probably will want to put something like newspaper down so clean-up is easier afterward. I place the RF module on a 3/4" piece of plywood board to protect the underneath and make the unit easy to carry around. This also allows the WD-40 to just flush through the gearbox on its way to the ground (newspapers.) Spray and brush - that's all you need to do. Work the WD-40 with the long handle brush through the gear teeth and flush. Don't worry about the Veeder-Root counter, it's impervious to WD-40. After the entire can has been flushed through the gear box, it will look like the photo to the right. Let it set outside for an hour or so to drain the residual WD-40. Bring it inside to the workbench and using cotton cloth or paper towels remove as much of the remaining WD-40 as you can. You will also have to dry the gearbox front and back plates and remove any stubborn grease during this detailing.

photo above: The gear box after a "flush and brush" cleaning as described. This is the RF module from a 1956 Motorola contract receiver.

photo above: One of the variable IF slug racks showing that one of the slugs has detached from the adjuster screw. To reattach it is necessary to heat the screw socket up with a soldering iron and when the solder is molten, reinsert the spring-shaft into the socket. When the solder sets-up, the slug will be firmly held in place.

When finished the gearbox will operate very easily and smoothly. Now, don't apply a lot of grease (or anything like the original green grease the military used) to the gear box. It should only be lightly oiled where the oil-lite bearings are. These are oil-impregnated bronze bearings but a little light oil won't hurt them. The anti-backlash gears don't need anything on them except light weight machine oil. Any grease or heavy oil will only act as a "dirt magnet" and attract the stuff that ends up hardening into what you have just cleaned off. Some of the straight-tooth gears can be lightly greased using modern, non-hardening grease. The surface edges of the cams can have a very light coating of the same modern grease. The conical gears on the Vedeer-Root counter can be also greased to reduce noise. The caveat is use the grease sparingly and use only modern, non-hardening grease. The lubrication guide in the military manuals should be used as a guide for application but use the grease and oil sparingly.

If you have serious problems with the gear box that is going to require disassembly to clear up, the go to www.r-390a.com and download the PDF file there on rebuilding the gear box. This PDF is very detailed and includes large photos of each reassembly step. It is the best guide available for gear box rework.

Removal of the Slug Racks - The slug racks are driven up and down via various cams that are part of the gear box. A long spring that is attached to holes in the chassis on one end and to the slug rack on the other end provide a downward pull that the cams work against. Each of the slug racks have three slugs that enter and retract from the RF and Variable IF coil barrels. To remove the slug racks merely detach the springs and the slug rack will lift off easily. Be careful as the slugs are somewhat prone to damage when handled roughly. Tag each slug rack so you know where it should be returned to. The slug racks each have two roller bearings that ride on the lifter cams. These roller bearings are almost always gummed up to the point where they won't turn. That means that the bearing was "skidding" along the cam surface instead of rolling like it should. Usually pressured oil such as WD-40 from the spray tube directed into the bearing end will clear the gunk out. Then oil the bearing with a good grade of light machine oil. The slug racks will probably need cleaning and carefully wipe off the slugs so they are clean.

IMPORTANT NOTE: Check all of the slugs to be sure they are the correct type. They should have a spline socket drive screw head (R-390 used slotted screw drive) and their color should be brownish-gray. Sometimes you'll run into R-390 slugs that have been installed as replacements however the R-390 slugs have a different permeability and shouldn't be used (as mentioned, R-390 slugs have a slotted drive adjuster screw.) Also, be careful to not interchange the Variable IF slugs with the RF slugs. Variable IF slugs have a slightly greenish tint. All RF slugs have the same permeability and are colored brownish-gray and all Variable IF slugs have the same permeability and are colored greenish-gray. The RF slugs and the Variable IF slugs are different from each other and do not the same permeability.

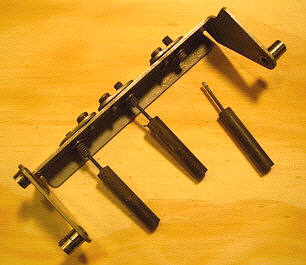
Slug Rack Spring Removal and Installation Tool - After years of messing around using long needle nose pliers to remove and install the Slug Rack springs I decided there has to be a better, faster way to do it. A very simple tool can be made from 16 gauge wire. I just used about six inches of wire with a very small open hook on one end and a loop on the other end for a handle. The loop can have shrink tubing installed to look more "professional." You'll have to experiment with the hook. It should be fairly open and be sure to use a jeweler's file to round the end so it will slide out from under the spring hook easily. To use the tool to remove a spring just slip the hook under the spring end and lift the spring end out of the hole. When installing a spring use the hook to lift and guide the spring end into the proper hole on the slug rack. With this tool I can remove the springs very quickly but re-installation is where this tool really shows its stuff. Installing the slug rack springs is now fast and easy. Photo to the right shows the tool next to a scale for size reference.


photo above
:  This is showing the sockets for the plug-in RF coils. It's obvious that a lot of dirt has made its way under the coils housings in this RF Module. Some of the gold plated sockets have corrosion beginning. Each socket has to be cleaned as described above and then inspected.

Removal of the RF Coil Assemblies - Each RF coil on the RF module plugs into small chassis mounted sockets. The coil assemblies are held in place with a small screw that is accessed down through the coil barrel. When this screw is loosened, the coil can be unplugged easily by pulling it straight up. Keep track of the coils because you will have to remove all 24 of them to have access to all of the sockets for cleaning. The chassis is marked as to which coils go where but keep track of where they reinstall anyway.

The Coil Assemblies themselves will need to be inspected for corrosion, problems with the trimmer capacitor and broken wires. The coil shield is removed by pressing the two tabs in and then pulling the shield off. Once the coil is out of the shield do your inspection and cleaning and then replace the shield. I clean the coil pins with De-Oxit and a Q-tip. I also clean the sockets using De-Oxit applied into the socket with a bare wire that fits into the sockets. This puts the De-Oxit right where it needs to be where a spray would be messy and waste a lot of De-Oxit.   Update - I don't use the bare wire anymore. I use a small wooden toothpick for working the De-Oxit into the socket. The wood doesn't scratch the gold plating but does work to safely remove oxidation and dirt.

When inspecting the Ant/RF amp coil assemblies, T-102, T-202, T-203, etc., be sure to check the all of the windings and especially the primary winding for evidence of burning due to excessive RF power being applied to the receiver antenna input. This will generally be found on the 2-4mc, 4-8mc, 8-16mc and 16-32mc coils since these are the coils that are used for ham bands coverage. However, it is most common to find the 2-4mc coil burned since this is used on 80M where most AM activity takes place. Not that AM specifically would cause this, it could happen on "tune up" in any mode. It's just that most R-390A receivers are being used by vintage ham gear enthusiasts and nearly all of their transmitting activity is on 80M AM.

When checking the wires in the RF coil, the primary wire should appear white or beige color. If you see the wire is black or has bubbles in the coating then excessive RF was applied. It's also possible that only a small burn might be noticed. If you're unsure about the condition of the RF coil in this regard, wait until you are aligning the receiver. It will be fairly obvious if the RF coil is damaged because the background noise in the receiver while connected to an antenna will be 20db or more lower on the 2.0mc and 3.0mc bands while all other bands have normal gain. To repair will require finding another RF coil assembly for that particular function as the coil can't be repaired. Even though the R-390A's "BREAK IN" function disconnects the antenna input from the receiver, it is possible that a defective external antenna relay might allow RF into the antenna while not allowing "BREAK IN" to function. See photo to the right showing a burned wire found on a '67 EAC receiver (it's almost burned in two.)

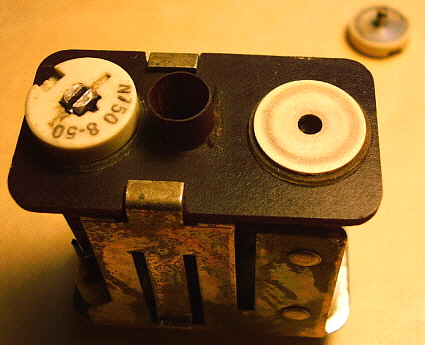
Carefully check the trimmer capacitor on each RF coil assembly. On early style RF coil assemblies, it's not uncommon to find some of these that have deformed rubber gaskets. Though the problem appears to be with the gasket, the actual problem is that the rotor and stator of the trimmer capacitor are stuck together. When the trimmer is adjusted, both rotor and stator turn and if the gasket isn't also stuck it will be forced out by the stator contact fingers. Examine the trimmer capacitor closely and note if both ceramic pieces move together - they shouldn't. Only the rotor should move (the top ceramic piece.) The stator should be held in place by friction from the gasket and the tension provided by the rotor contact clip (later versions are glued in place.) If both ceramic pieces move together then the rotor and stator are stuck together and the trimmer must be disassembled to repair it. The procedure is below in "Repairing RF Coil Trimmer Capacitors." It is also possible to just replace the entire RF coil assembly with a known operational one. If you reinstall the RF coil assembly with the defective trimmer capacitor still in place, you'll find that when trying to align the RF section of the receiver, you won't be able to adjust the high frequency end of the particular coil because the capacitance doesn't change. The "stuck rotor-stator" problem shows up only on the early version RF coil assemblies. By the sixties, the mounting technique changed and the stator and gasket are glued together and then the gasket is glued to the fiber board. Also, the gasket is made out of a different type of material. This mounting technique practically eliminated the problem since the stator and gasket can't move.

When you have the RF coil assembly apart, if the trimmer looks okay, then place a small drop of De-Oxit on the bottom connection of the trimmer rotor as this does tend to oxidize more than other parts. The photos below show close-ups of the typical R-390A RF coil assembly.

1

2

3

Photo 1 - This shows the complete RF coil assembly after it's removed from the RF module. Looking at the underside. Note the "dish shaped" dimple for the mounting screw.

Photo 2 - Close-up of the underside of the assembly showing the contact pins.

Photo 3 - A shot inside showing the mica capacitors and the coil. This coil is an 18mc to 32mc coil. The ceramic trimmer capacitor is on top of the fiber board.

Photo 4 - Another shot inside showing the contact of the trimmer capacitor rotor and how it connects to the coil and fixed capacitors.  This contact should be given a drop of De-Oxit since it always seems to look oxidized. The longer tab to the left is the trimmer capacitor stator connection.

4

Repairing Early Style RF Coil Trimmer Capacitors - When working on early RF decks, especially Collins and Motorola types from the 1950s, you are sure to be working on early style RF coil assemblies. When you remove the RF Coil assembly from its housing you might find that the trimmer capacitor looks like the one shown in the photo to the right, photo 1. This is a sure indication that the rotor and stator of the trimmer are stuck together. When the trimmer is adjusted, since the stator also turns that action usually forces the gasket out due to the gasket opening pushing against the two stator contact fingers. Closely observe the side of the trimmer capacitor while it is being rotated and you'll note that both ceramic pieces rotate together indicating that they are stuck together. Disassembly is necessary to un-stick the rotor and stator, clean the pieces and then reassemble. First, note the underside connections to the trimmer capacitor and that the rotor is secured in place with a spring clip - see photo 2. Using small needle-nose pliers working against the side rail of the RF coil assembly, gently move the spring clip to disengage the rotor pin. Looking at photo 2 the spring clip would be moved to the right to disengage the rotor pin.   IMPORTANT NOTE: Be very careful and note whether the spring clip is connected to the coil return (it will be on some RF coils.) If it is, unsolder the coil return wire off of the spring clip connection before trying to disengage it. Otherwise you might break the wire from the coil as you move the rotor clip.

Now the ceramic pieces and the gasket should easily be removable, in fact, they'll probably fall off of the fiber board. If they aren't easily removed you might have a later version coil assembly that has the gasket and stator glued to the fiber board. DO NOT try to force the stator and gasket off of the fiber board or you'll surely break the delicate ceramic stator. If it is the later style trimmer then there should be no problem with stator contact or with the gasket and most of the issues would be with rotor contact and dirt between the rotor and stator causing them to stick.

Now on early style trimmers, note that there are three pieces, the rotor, the stator and the gasket. Also note, that there are two contact fingers that protrude thru the fiber board and also form a connection terminal below the fiber board. These are the stator contact fingers. The next step is to un-stick the rotor and stator. Usually an Exact-o knife can be use to separate the rotor and stator. Usually, the "gunk" that is sticking the two pieces together isn't very strong and separating the two pieces is easy. Now clean both ceramic pieces with denatured alcohol. You can also use a pencil eraser for stubborn dirt. Note how the metal parts are embedded in the ceramic. The stator's metal piece faces down on the gasket and the metal piece makes contact with the stator contact fingers. Then the rotor is mounted with the metal plate down. Note that the trimmer capacitor is using the ceramic spacing as the dielectric and that rotating the top piece (rotor) actually varies the capacitance if the stator stays in a fixed position. With the pieces clean first place the gasket as shown in photo 3. Then place the stator in position as shown in the photo 4 making sure that the stator contact pins are touching the stator plate. Now place the rotor in position and hold in place with your fingers until you can re-install the rotor contact clip using the small needle-nose pliers. Test the trimmer by rotating it. The stator should stay in position while the rotor is moved. You might have to use a very tiny amount of super glue to hold the gasket to the stator piece to keep it in the proper position and a small amount of super glue to hold the gasket in place on the fiber board. This is how later RF coil trimmer capacitors are mounted and this all but eliminated the problem. However, you can mount it "as original" and just the gasket friction against the fiber board should be enough to keep the stator from rotating. Reassemble the RF coil, install in the receiver and test. Realignment will, of course, be necessary after this procedure but you really couldn't proceed with any alignment until this type of problem was repaired anyway.

NOTE: Bear-WB2GCR, reports that he has found several R-390A and other similar trimmers where the silver coating has been abraded off or worn off. The result is very little or no change in capacitance as the trimmer is rotated. There are several methods of repair. First, you can replace the entire RF Coil assembly. Second, if you want to retain the original RF Coil "shielded housing" (for the manufacturer identification) you can just replace the actual RF Coil itself. If you don't have access to spare RF Coils, it is possible to still purchase this style of trimmer capacitor and from the new trimmer remove the rotor (which is the part that wears) and do a remove-replace on the old trimmer to repair. 

1

Photo 1 - Showing how the gasket is forced out when the rotor and stator are stuck

Photo 2 - The rotor clip secures the assembly

Photo 3 - Gasket and the stator contact pins

Photo 4 - Stator placement over gasket


2

3

4

Other Common Problems - Check the band switch for corrosion and that it is correctly synchronized. Clean with De-Oxit applied with a small paint brush. Inspect and clean with De-Oxit the two Crystal Oscillator switches and all 17 crystal sockets and crystal pins.

Check the mechanical alignment of the RF and Variable IF slugs as they enter and retract from their respective coils. All slugs should enter directly into the barrel and not be entering the barrel misaligned where the slug rubs against the inside of the barrel excessively. It's very common to find the slug's spring wire extension to the adjusting screw bent, sometimes excessively. The cause is misalignment of the slug entry into the coil barrel. The two screws that hold the adjusting screw assembly to the slug rack can be loosened and then you can move the slug and the adjusting screw assembly to mechanically align the entry of the slug into the coil barrel. Then retighten the screws. If the slugs to coil barrels alignment is correct, the slug rack will drop down with its own weight (without return springs installed) as the MC or KC tuning is adjusted.

If you want to replace the three paper capacitors, on early decks they are the brown body molded caps with the color code banding. These are pretty good quality for molded paper caps but some rebuilders do find the molded body is cracked on these capacitors (I haven't.) It's probably a good idea to replace them anyway. Most RF modules built from the 1960s-on will use later style, non-molded capacitors. These appear to be film capacitors that shouldn't require replacement. Also, later version modules will have ceramic disks that won't need replacing.

Use 400 volt 716P type SBE Orange Drops as replacement caps. There is another paper cap (.047uf at 100wvdc) that is a metal body, oil-filled, chassis mount unit mounted behind the RF amplifier tube. This capacitor normally isn't replaced since it's an oil-filled type and looks like it was specifically made for its application.

Clean the tube sockets using De-Oxit. A short spray followed by actually applying some De-Oxit with a bare wire to each tube pin. Then a short spray on a tube's pins and then plug the tube in and out of the socket several times. This usually will clean the tube sockets pretty well. I've also used a small but stiff paint brush to "work" De-Oxit into the tube socket. This results is a lot less De-Oxit going into the socket pins and better cleaning if there isn't too much oxidation or dirt. I also use a small wooden toothpick to "work" the DeOxit into the socket to further clean up oxidation.

Be sure to repaint the screw heads green on the captive screws and also repaint the heads of the seven other screws that secure the RF Module. Be sure to use #6 flat washers on these seven screws. The holes for these seven screws are over-size making the flat washer necessary. The captive screws should already have split-ring lock washers installed but check to make sure.

photo right: This shows the Variable IF section on the RF Module. Note that the corrosion has made its way to the tube socket pins. These have to be cleaned with De-Oxit. Also note the Variable IF coil sockets in the upper part of the of the photo. Again, a lot of dirt and some corrosion has made its way under the six plug-in Variable IF coils. The large octal socket is for the dual crystal/oven plug in that is part of the 100KC Crystal Calibration Oscillator and the 17mc Crystal Fixed -Frequency Oscillator.

Checking Cam Synchronization - Set the Veeder-Root counter to 07+000. This is actually 8.000mc on the 7.0mc band. You want the "+" indicator to have just moved into place. Now look at the slug rack lifter cams on the front plate. You'll note that there are indicator lines marked by each cam. At this setting of the counter, each of the cam "points" should be pointing exacting to the indicator line. This shows that all of the lifter cams are synchronized with the Veeder-Root counter and the gear train. If you find one or two cams that are not pointing to the indicator line, check your setting of the Veeder-Root counter to make sure you are at 07+000. If correct, then perhaps one of the shaft clamps has loosened. To set the cam, loosed the shaft clamp and move the cam so that it exactly points to the indicator line, then tighten the clamp. Be careful! Don't over-tighten or you'll break the clamp. If you break the clamp it's a major disassembly of the gearbox to replace. This applies to almost any of the clamps but not all. Just be careful and don't over-tighten the clamps. I've only run into a broken cam shaft clamp once. To replace the clamp required 27 steps into the gearbox disassembly procedure. Once the clamp is reasonably tightened, adjust the MC knob and check for rotation of the cam. Place your finger with a slight pressure exerted on the specific slug rack to make sure the cam clamp doesn't slip. Tighten slightly if it does. Perform this procedure to any cam that doesn't point exactly at the indicator line when the counter is at 07+000.

Crystal Oscillator Unit - Mounted to the left side of the RF Module is the Crystal Oscillator Unit. There are some things that need to be checked in this module and in its mechanical connection to the RF module. There are two large 31 position switches inside the module that control crystal selection and oscillator trimmer selection. Under the metal cover are 17 crystals that are used in both the double or triple conversion scheme (triple conversion uses an additional fixed-frequency crystal-controlled oscillator running at 17mc) and as either fundamentals or harmonic oscillators. As a result, 17 crystals can cover 31 tuning ranges. The metal cover is also the oven and contains the heater element in the upper inside part of the cover. Two wires provide connection to the oven voltage (if its operation is selected by a switch on the rear panel of the receiver.) The switch to turn OFF the oven is located on the back panel at the lower right corner.

During a rebuild, each crystal should be removed from its socket and the socket checked for corrosion. The crystal pins should also be checked for corrosion. Remove corrosion if found with a very small amount of De-Oxit applied with a small stiff paint brush for the sockets and with a De-Oxit dampened paper towel for the crystal pins. Re-install the crystals when the operation is completed. The contacts of the two 31 position switches can be cleaned with a small paint brush dampened with De-Oxit.  >>>

>>>  Check the relationship of the RF module MC range selected versus the Crystal Oscillator selection. There is a small round opening on top of the Crystal Oscillator Unit just in front of the adjustment trimmers. You'll notice that inside the opening you can see a numbered wheel. The number in the opening has to agree with the MC selected by the RF Module. If 12.XXX is selected, then 12 will show in the opening. There are no "odd" numbers indicated, so if 11.XXX is selected, the wheel will be on the line between 10 and 12. This checks the synchronization of the Crystal Oscillator to the RF Module. If it doesn't agree, you have to loosen the clamp on the Crystal Oscillator drive gear and then rotate the shaft using the screwdriver slot accessed through a hole in the rear of the Crystal Oscillator housing until the number in the opening agrees with the MC selected. Then retighten the shaft clamp.

When the R-390A is rebuilt and basically operational but before alignment, you'll have to check the output level of the Crystal Oscillator. With the receiver in the Stand By position, check test point E-210 for voltage (the voltage won't be present unless the receiver's Function switch is set to Stand By.) The DC voltage should be between -3.5vdc and about -8.0vdc. Start at 8mc by selecting the 08.000 range and adjust the marked trimmer for maximum indication on the voltmeter (use a VTVM.) Work up in succession from 8mc up to 31mc. The voltage should be indicated on the detent of each band selected. The bands lower than 8mc operate on triple conversion and use harmonics of the crystals that were already adjusted on the higher frequencies that are double conversion. Crystal trimmer adjustment isn't necessary on the lower frequencies. When complete, check that there is voltage indicated on all MC selected. This completes pre-testing of the Crystal Oscillator.

Slug Problem on a 1951 Collins R-390 Receiver - I recently noticed that my R-390 receiver didn't seem to have the sensitivity that it used to have. I had the RF Gain at max with the Local Gain up pretty high and the Carrier Level meter still wasn't moving very much. After participating in a couple of nets, I decided that something was going bad or had gone wrong. It had been a couple of years since I checked all of the tubes, so that was the first task. I turned up three marginal tubes - not bad, just going bad - gassy or on the weak side. I didn't expect this to solve the low gain issue but the receiver was due for the tube check out and the testing would eliminate a bad tube as the source of any other problems. After the tube testing was finished a closer check of performance provided the vital clue. By operating the R-390 with the antenna disconnected and using the Calibrator as the signal source I changed tuning ranges up and down the bands. I noticed that from 500kc up to 2.0mc the receiver had normal sensitivity and the bands from 4.0mc on up also had normal sensitivity. The vital clue was that only the 2mc to 4mc coverage was affected. This meant that the problem was in RF section and specifically in the slug rack/RF transformers that tuned the 2mc-4mc range. A quick look and the problem was apparent. The slug for the Antenna stage had come off of the slug adjusting screw and was all the way down the Antenna transformer coil barrel. It's an easy fix only requiring that the 2-4mc slug rack be lifted up to pull all of the slugs out of their RF transformers. I left the rack springs connected and only pulled the rack up as high as necessary to have the slugs clear the slug barrels. I then removed the loose slug out of the Antenna transformer and removed the adjusting screw out of the rack. Using a soldering iron, I heated the adjusting screw up and melted a small amount of solder into the hole and then inserted the slug's flexible carrier wire into the hole. After the solder had set up, I tested to make sure the flexible carrier wire was in the hole securely. I then rethreaded the adjusting screw back into the rack and then guided all of the slugs back into their respective barrels as I lowered the slug rack back into position. I performed a "quickie" alignment on the Antenna stage and that completed the repair. I'm relating this little problem because it shows that even in an excellent condition rebuilt receiver minor little problems will come up from time to time. Familiarity with the receiver's design made the problem easy to locate and repair. 
 

Restoring the IF Module

Next in difficulty is the IF Module. There are several components that need to be carefully checked and, if you are replacing the paper caps, this module has more capacitors than any other (paper caps are primarily found in pre-1960 vintage modules - polyfilms caps were used in the 1960s.) The area under the chassis is very limited and the capacitors must be mounted in the same position as the originals. This means that you will have to use 716P type 400wvdc SBE Orange Drop capacitors. These are somewhat flat in shape rather than round and allow easier installation. Besides, the 716P are better quality polypropylene types. The 715P 400wvdc caps can be used in some places but the value .033uf is not available in 715P types.

The BFO PTO - In order to replace the three capacitors mounted on the side of the chassis under the bellows-coupler, you'll have to remove the bellows-coupler from the BFO PTO. Be sure to mark the position of the BFO PTO shaft so reinstallation will end up with the shaft in the same position. To remove the bellows-coupler you'll have to heat the spline socket set screws with a soldering iron tip to weaken the green Loc-tite. Loosen the front BFO shaft bearing to allow moving the front shaft out of the way and the bellows-coupler will just have enough clearance to remove it while leaving the BFO-PTO and the front shaft in place. After installing the three capacitors, reinstall the bellows-coupler.


photo above: The underneath of the IF module after installing the SBE 716P type polypropylene capacitors. Note that there is not an awful lot of room in this module making the installation of the replacement capacitors somewhat of a challenge.

Note that the BFO PTO shaft threads in and out of the housing as it's turned, however, the front shaft is fixed in position. This is the reason for the bellows-coupler. It must be able to compensate for the movement of the PTO shaft and the non-movement of the front shaft. When installing the bellows-coupler, tighten the PTO set screws first, then just slightly extend the coupler before tightening the front shaft set screws. Make sure as you adjust the BFO PTO a half of a turn in each direction from the index mark (that you put on the shaft, right?) that the bellows-coupler compensates for the PTO shaft movement. If your receiver has the Microdial on the BFO, you'll have to check to make sure your setting of the bellows-coupler can compensate for about 1.3 turns in each direction from 0. The Microdial allowed setting the BFO +/-13kc from 0 while normal BFO setting was +/-3kc.

Plate Blocking Capacitor (for the Mechanical Filters) - When replacing the Plate Blocking capacitor C-553, remember you are replacing a 300wvdc Vitamin-Q type capacitor that, in the 1950s, was one of the best capacitors available. Don't replace this vintage quality capacitor with a Malaysian-made, less-than-one cent total-cost capacitor. If I was really worrying (like loosing sleep over it,) I'd use two .022uf caps in series for the .01uf C-553. This redundancy is pretty much fool proof for any future problems. Normally though, I use a .01uf 600wvdc 715P type SBE Orange Drop. The "double the working voltage of original" is usually enough precaution on this controversial component.

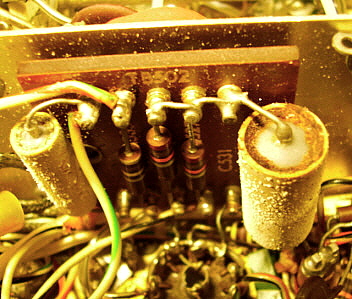
Component Corrosion - Depending on how the R-390A was stored you might find a lot of corrosion on the Vitamin-Q type capacitors. Shown in the photo to the right is C-531 mounted on TB-502 from a 1960 EAC IF module (EAC built spares for R-390A at that time.) This IF module is out of a "Blue Striper" type R-390A. These receivers were typically stored outside, stacked on pallets. This photo shows what can happen with high humidity, large temperature excursions with no protection for the receiver from the environmental conditions. Luckily, most R-390As were stored much better than the "Blue Stripers" from St. Julian's Creek Annex and this severe of corrosion is rare. It's also interesting to note that this "Blue Striper" IF module has an open input transducer in the 4KC mechanical filter probably due to an unsuspecting technician (not me) powering the receiver up without first checking out the condition of  C-553. Luckily, only one mechanical filter was destroyed. (I've since harvested the 8kc and 16kc MFs out of this module.)


photo above: Poor storage conditions can cause corrosion damage as can be seen on these capacitors in an EAC IF module. Also, C-553 (not shown,) the plate blocking cap for the mechanical filters was defective in this EAC module as was the 4KC filter.

Testing the Mechanical Filters - Sometimes individual IF modules turn up for sale. Most of the time we can't test the module and have to rely on luck that everything will be usable in the module and just replacing the capacitors will let us end up with a good condition unit. If you have the opportunity to check out a prospective IF module before purchase, testing the condition of the mechanical filters is fairly easy with the IF module out of the receiver. Each of the mechanical filters will have an input transducer and an output transducer. These, essentially, are pick-up coils that are somewhat like a magnetic pick-up in that they respond to the movement of the discs and wire supports that make up the rest of the mechanical filter. You can measure the DC resistance (DCR) of each mechanical filter input and output transducer to see if it's likely to function correctly. An open transducer coil will mean the filter is not operational and can't be repaired. When the BANDWIDTH switch is set to a specific filter, say the 16KC filter, only that filter can be measured for DCR since the BANDWIDTH switch grounds the inputs and outputs of the non-selected filters.

16KC MF Transducer DCR = 20 to 25 ohms (with Bandwidth in 16KC position) both transducers

8KC  MF Transducer DCR = 25 to 30 ohms (with Bandwidth in 8KC position) both transducers

4KC MF Transducer DCR = 35 to 40 ohms (with Bandwidth in 4KC position) both transducers

2KC MF Transducer DCR = 60 to 90 ohms (with Bandwidth in 2KC position) both transducers

The DCRs shown are approximate and can vary by several ohms - depending also on your particular DMM among other things. Just be sure that each input and output transducer has continuity and the DCR is approximately as shown above. If you measure an open circuit transducer then that filter will not work and it can't be repaired - it must be replaced with a good filter. If you're testing a prospective IF module and find an open input transducer on one of the mechanical filters you probably wouldn't buy that IF module (unless it was really "price reduced" after testing.) But, if you're considering repairing that IF module, then be suspect of C-553 since the failure happens to be the input coil. I've only run into this once but it can and apparently does happen, that is, a shorted C-553 allowing B+ to appear on a mechanical filter input transducer and causing the coil to go "open circuit." However, I've also found two mechanical filters in one IF module defective with open output transducers. How this happened is a mystery since the output transducer connects to the grid of the 2nd IF amplifier tube and that is normally a very low voltage and very low current input. In all cases where a mechanical filter transducer is open, the only repair is to replace the defective mechanical filter. Many rebuilders go ahead and replace C-553 regardless since its failure can have, even if it is a rare occurrence, such a devastating result to the mechanical filters.

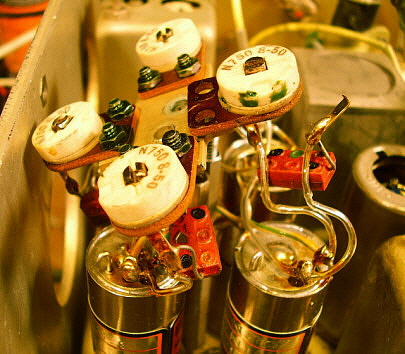
Other Problems - Some problems won't be discovered until you are performing the alignment. An example is the problem shown in the photo to the left. This is the IF module from the 1956 Motorola contract receiver. When adjusting the mechanical filter trimmers it was found that the 16kc top trimmer wouldn't adjust. Closer examination revealed that the trimmer connection was physically broken. These thin brass connections are very fragile and will break if they are bent too far. I don't think this break was a result of mishandling, I think it just broke due to a flaw in the brass. Trying to find someone with a "parts set" who would remove the top trimmer assembly was going to be difficult. Also, a complete "parts set" IF module would be fairly expensive. I decided to repair the trimmer instead. I first dismounted the entire top assembly and then dismounted just the 16kc trimmer to allow good access to the broken trimmer. I used very thin brass to make a duplicate connection tang. I "sweat soldered" it to the bottom three finger spring/retainer. I tested the trimmer with a capacitance meter to confirm that the repair did function correctly. I then bent the tang to conform to the original broken tang and "sweat soldered" that to the new tang. Once the trimmer was repaired and the connections made, all that remained was to remount the parts. Now the 16kc mechanical filter could be adjusted for maximum gain. Of course, the best repair would have been a new assembly but most of the time small parts that are unique to the R-390A are difficult to find without buying an entire module as a "parts unit."

During the alignment of the receiver, anytime you run into an adjustment that doesn't seem to do anything to the voltage reading, it usually indicates that something is defective in that part of the circuit. Inspect the circuit components and many times the problem is mechanical in nature and easy to spot. Of course, sometimes troubleshooting is required but an inspection should always be tried first.

photo left: The mechanical filters and the output trimmers showing how unexpected damage can occur even in protected assemblies.

IF Module Alignment - Accessing the Mechanical Filter Input Trimmers - These trimmers were added with the 1956 contract R-390A receivers. The 1954 and 1955 contract receivers will have fixed value mica tuning capacitors. The trimmers allow "tuning" the input and output transducers of each mechanical filter to exactly 455kc where the early MFs that had fixed capacitors didn't allow exact tuning at all.

It will be noted that the trimmers for the MF input transducers are on the side of the IF module and cannot be accessed when the module is installed in the receiver. Most of us don't have the extension cables that allow operating the module outside the receiver but you can still do the mechanical filter trimmer alignment by this following procedure.

Loosen the Bandwidth and BFO shaft couplers and pull the shafts forward. Then unscrew the three captive screws. The coaxial cables are all disconnected but connect the short IF Output coax to E513 on the IF module. This provides a BNC connector for signal injection. A VTVM is connected to the Diode Load as an output indicator. Leave the IF module power cable connected. Now, carefully lift the IF module up in the front and insert a piece of thin cardboard under it to act as an insulator (or you can use tube boxes as shown in the photo right) and rest the front of the IF module on the upper edge of the front panel. If you position it correctly, you'll now have access to the four filter input trimmers through one of the holes in the side panel (see photo right and note the four trimmers accessible in the side panel hole.) Install a knob on the SELECTIVITY switch because you are going to have to select each MF as you adjust the two associated trimmers (input and output.) 

After peaking these adjustments, return the IF module back to its normal position and reinstall the all hardware. If you are proceeding on to the IF transformer adjustments then leave E513 connected to the IF output BNC on the back panel.

3TF7 Ballast Tube - The ballast tube is essentially a length of "heat/current versus resistance" wire (iron, usually) in a gas-filled tube (helium, most likely.) Since the resistance increases as the wire heats up, which is a function of an increase in the current flowing through the wire, this increase in resistance then decreases the current flow. With the current flow decrease, the wire cools and the resistance decreases which allows more current to flow thereby increasing the heat and resistance. This variation in the wire's resistance is what regulates the voltage drop. Of course, the current flow is normally very stable but the ballast tube provides regulation for slow changes like variations in the line voltage to the receiver. Ballast tubes are generally used as tube heater regulators and the 3TF7 in the R-390A is used to regulate the PTO tube and the BFO tube heaters. The 3TF7 is getting to be fairly expensive and, although they are pretty reliable, you probably will experience a ballast tube failure sooner or later. At present, a NOS 3TF7 is about $20+. If you don't want to spend the money for the correct component, you can substitute certain types of 12vac heater tubes, such as the 12BH7. This will require a couple of TC wire jumps on the tube pins for the correct connections. The current requirement for the 12vac heater acts similar to the 3TF7 and drops around 12 volts so the two oscillator tube heaters (6.3vac series wired) also drop 12 volts and that satisfies the 24vac provided by the R-390A power supply. There are many other schemes to replace the 3TF7, some that use active voltage regulators or even bypassing the ballast tube socket altogether and installing 12 volt tubes for the PTO and BFO. Several methods are detailed on the Internet.
NOTE
: I've often wondered if the typical "high line" AC voltages in some areas contributes to the random failures of the 3TF7. If you've ever watched this ballast tube at "power up" it does incandesce quite a bit. With some areas (like here in Dayton, NV) experiencing AC line voltage approaching 125vac (124vac here) one wonders if the increased filament voltage has an effect on the 3TF7 power-up surge. As of 2022, when our AC line increased to 124vac, I've started always using a line-bucking transformer for all R-390A operation and that lowers the AC line to 116vac. More info in Part 2 in "Line Bucking Transformer."
An Interesting Problem in an Amelco IF Module - N7RCA wanted me to do an alignment and check out on his Amelco R-390A. I was told that one of the tubes in the IF deck was intermittent and had to be moved every now and again to get the receiver working. A quick inspection of the IF module didn't reveal anything unusual. However, when powered up the R-390A would often not receive the CAL signal and physically moving V-504 (the 4th IF amp) in its socket would eventually get the module working. I traced the problem to the ground return on the tube heater at the tube socket. If an external jumper was used, the tube worked fine but it wouldn't work without the external jump. Obviously, there was no ground return for the heater. I thought that I had inspected the wiring so I decided that the socket must have a cracked pin connection and needed replacing. However, when the socket was about half removed I discovered the actual cause of the problem. The TC wire that was routed from the tube socket to a ground lug was NEVER soldered at the ground lug. The ground lug was hidden somewhat by the wiring harness which probably explained why the unsoldered joint was never found at inspection. Apparently, the crimp joint functioned fine and the module passed test and worked for years. Only after many more years of aging with expansion and contraction plus maybe minor oxidation did the crimp joint begin to cause problems. This is the only time I've ever found an unsoldered joint in any R-390A module but it shows that almost anything is possible even with first class builders and thorough inspections. The Amelco did get a new tube socket in the process since removal does usually end up damaging the old sockets. Of course, with a proper heater ground return on V-504, the IF module worked fine.           March 2014
Interesting AGC Problem in 1967 EAC IF Module - I was finishing up going thru a 1967 EAC R-390A and was in the process of aligning the IF module. When I got to the AGC LC Z503, I found that the AGC line at the rear terminal was < -1 vdc and regardless of the signal level input, that voltage didn't change. I had already tested all of the tubes so I didn't think there was a problem there. I installed an extension test socket into the 5749 tube that is the AGC Amplifier. Measuring the voltage on pin 5 (plate) I found there was no plate voltage. Checking the schematic showed that the only route for B+ voltage to the AGC Amplifier plate was thru Z503. To confirm that Z503 was the problem, I measured the DCR of the coil and found it to be open. Z503 would need to be replaced.

I had several "parts set" IF modules to choose a Z503 from. I did actually have an EAC IF module but it was an early "spares" version, probably from the early sixties. Checking Z503 on this module revealed something interesting,...there wasn't a ferrite shield around the coil of Z503. The method of construction doesn't allow for its removal so this Z503 must have been built without a ferrite shield (not surprising from EAC.) I checked all of the other "parts set" modules and all of the Z503s had their ferrite shields. Hmmm. Anyway, I decided to use the Z503 out of a 1961 Capehart IF module as it seemed to be the best match.

The process is to remove the Z503 from the "parts set" module. Then remove the defective Z503 from the '67 EAC module. Then install the replacement Z503. All easy enough except for how Z503 is mounted in the module. The photo to the right shows the connections to Z503. The two terminals of the LC are easy,...one lead to pin 5 of the 5749 and two components leads on the other terminal. It's the stand-offs that are a problem. The Z503 is mounted with washers, nuts and then two insulated stand-offs. These stand-offs provide connections for about six components or wires on each stand-off. These all have to be removed to dismount Z503. Using a small 25 watt Weller Soldering Station, a metal soldering aid tool, a small blade screwdriver, solder wick and needle nose pliers, I carefully heated and unwrapped each lead from top to bottom. Then the stand-off could be unscrewed. The same process is used for the other stand-off. Then the nuts and washers can be removed and Z503 dismounted off of the chassis.

The same process has to be repeated for removing the defective Z503. Next, install the good Z503 and reverse the process to complete installation. Don't use an excessive amount of solder. Only a good flow around all of the leads is required. If carefully done, without the soldering iron touching nearby components, the rework should look like an original installation.

I reinstalled the IF module back into the receiver and applied power to it and to the test gear. The AGC worked correctly and I was easily able to adjust Z503 for a peak voltage

Shown to the right is Z503 from another '67 EAC IF module I have. I've removed the shielded cover to show how the ferrite shield looks inside the unit. The shield is held in place with glue that surrounds the coil and the inside of the shield. It can't be removed without destroying the coil. It's interesting that the early "spares" EAC IF module has a Z503 with no ferrite shield. As to dating, I also inspected an earlier 1959 Stewart-Warner IF module and its Z503 had a ferrite shield installed. As to why the "spares" EAC doesn't have the ferrite shield,... well, it seems to confirm EAC's "hit or miss" inspection process.    July 2017

Carrier Meter Adjustment - The pot that controls the action of the Carrier Level meter is located on the IF module. If ever there was a potentiometer adjustment that doesn't seem to "stay put" it's this one. It's easy enough to adjust. Just disconnect the antenna and, with the RF Gain fully advanced and the AGC on, adjust the pot until the meter reads zero or maybe one "needle's width" above zero. Although you can tighten the lock nut, it's not recommended since you'll probably be adjusting this pot again fairly soon. The pot has too great of resistance change for what the circuit needs. Therefore, minute changes in the pot adjustment cause major changes in the meter action. At one time, there was a modification to install a ten-turn pot to have higher "adjustment movement to resistance change" for better stability. There was also a MWO for some changes to the CL pot and a few components for better adjustability. If the receiver's IF deck is in good condition or rebuilt, the meter adjustment problems seem to be less of a problem. 
 

Restoring the Audio Module

The Audio Module not only has the two audio output components for LOCAL and LINE but also contains the Power Supply filter capacitors and chokes along with the 800 cycle bandpass filter and Break-in relay. I usually check continuity of the chokes and audio transformers while I have the AF module out. If it worked before hand, then there's no need to check. Sometimes, though, you've never operated the module (or receiver either) and that case I usually check the iron just to confirm I won't have any problems after installation back in the receiver. 

Reforming the Electrolytic Capacitors (it might work) - If you don't rebuild the two filter capacitors, at least fully test and reform them. When I used to reform these capacitors I used an adjustable Lambda 25 power supply that had a variable 200vdc to 375vdc output. I connected a 10mA FS current meter in series to watched the current draw as the capacitor is reformed. I only did one section of the multi-section capacitors at a time. Due to the limitation of the Lambda 25 starting out at 200vdc, I checked the capacitor with another power supply that adjusted from 0vdc up to 50vdc. Then I switched over to the Lambda 25. When the electrolytic was first connected to the power supply, the current draw would be fairly high (probably around 100mA) for a very short time. Almost immediately the current would drop down below 10mA. I kept increasing the voltage every few seconds. The current increased and then almost immediately would drop down. When I reached +300vdc on the section, I watched the current. It should slowly drop to below 1mA. I let the voltage remain on the capacitor section for an hour or so. When checked after an hour, the current was usually around 500uA or less. This indicated a good condition capacitor that was reformed. I usually fully discharged the tested section and then measured its capacitance. If it was within spec, I considered the capacitor ready to use.

If your reforming acts differently than described above be suspicious of that section of the electrolytic capacitor. Sometimes you'll see the current "pulsing" or "bouncing" up and down. This indicates that the dielectric is breaking down and the capacitor will not be functional very long. Installed in the R-390A, these caps seem to work but you may notice a random "popping" or "thumping" sound in the audio. It's best to weed-out these caps before using them in the receiver. Of course, if you rebuild the electrolytics, you usually don't have to worry. The procedure for rebuilding using the original can but with new capacitors inside is below.

Replacing the Paper Dielectric Capacitors - There are some restorers that change the value of the coupling capacitors to the grids of the 1st AF amp and the audio output grid. Originally these were .01uf in value. The normal change is to replace them with .02uf, supposedly for better bottom end of the audio. If this change is incorporated it's usually only done on the LOCAL AUDIO section. The LINE AUDIO section is left stock because this was usually dedicated to running teletype converters or other auxiliary devices. However, if you want the drive another 600Z ohm speaker with the LINE AUDIO, then you might want to replace these coupling caps too. I don't notice very much difference between .01uf or .02uf coupling caps and if an original type of military loudspeaker is used, then the change won't be audible anyway. I usually don't change the original value of these coupling caps.

Be sure to use the 716P type 400wvdc SBE caps since they are flat and will not cause interference with the Main Frame bed plate when the AF Module is reinstalled. You will still have to watch the mounting of these components. The PC board that the components mount on is fairly high resulting in tight clearance between the components and the Main Frame bed plate. 715P and 600wvdc caps are too large for the clearance available. You should also replace the small electrolytic (tantalum) capacitor mounted on the PC board.

You'll probably notice the butch plate installed on the top of the chassis next to the power input connectors. This was to provide an area to install a squelch circuit modification if necessary. Sometimes, R-390A receivers will seem to have an extra switch position past the CAL on the FUNCTION switch. Normally, there was supposed to be stop key installed under the FUNCTION switch mounting nut that prevented rotating to this unused position. But, careless reassembly sometimes resulted in the stop key not being installed. But, this extra switch position was available if the squelch mod was installed. I've never encountered a R-390A with the squelch mod added.
 

Rebuilding the Multi-Section Electrolytic Capacitors

When I wrote the section above (about 13 years ago) it seemed like most of the original electrolytic capacitors could be successfully reformed. In 2016, when I was restoring a 1967 EAC, I found that the triple-30uf cap had one defective section (cap date-coded '67.) I pulled out my spare '390 electrolytics and found that ALL of them had at least one section defective - either entirely open or erratic current draw while reforming. Maybe it's time to realize that these electrolytic capacitors are at least fifty years old and most are many years older. I think as these units age more and more we're going to find more and more failures. I would recommend to all restorers working on R-390A receivers nowadays to go ahead and either purchase the new replacement units or rebuild the old electrolytic cans using new capacitors for best reliability and performance. NOTE for 2022: Nowadays in 2022, the original filter electrolytics are even older and their reliability will just continue to be an issue if they are spares that aren't being continually formed within the circuit. I'd guess that every spare original filter electrolytic won't pass any sort of test now. Buy a set of the new replacements (available from Nationwide Radio - KE9PQ.)
BUT, if you're interested, the following is how I used to rebuild the can electrolytics.

First, obtain three 33uf 350wvdc axial lead electrolytic capacitors and two 47uf 350wvdc axial lead electrolytic capacitors. When the caps arrive, test them for value (just to be sure.) Next, you'll need to open up the two cans. You can use a tubing cutter if you have one that will handle 1.5" diameter tubing. If not, use a hack saw. Scribe a line around the cans about .25" above the crimp. This will be below the black tar fill but above the crimp that holds the base to the can. The scribe line is so you cut a straight cut. Be sure to scribe a vertical line across the horizontal scribe as a reference for reassembly.

Once you have made your cut, go ahead and then cut the leads that connect the internal capacitors to the base terminals. This separates the top part of the can from the bottom. The top will have the black tar and old caps inside.

Get your heat gun and a heavy pair of leather gloves. Place the top can on a large metal tray and begin heating its exterior with the heat gun. Rotate the can so you heat all around it. This will take about 2 minutes to get really hot (why you need the heavy gloves.) Use a pair of needle nose pliers and grab the leads and then pull the old cap out of the can. If you've heated it up long enough, it will just pull out easily. If not, apply more heat until it does pull out easily. Discard the old cap. Using a long blade, scrape out all of the black tar while it's still warm. It will be pretty easy to get out at this time. >>>

1

>>> Cut a heavy paper circle that will just fit into the inside of the top can and push this down inside the top of the can to act as an insulator. This really isn't necessary on the dual 47uf capacitor but is extra safety for the 33uf assembly which is a "tight fit" and pushes up against the top inside when assembled. The can is not connected to anything in either of these two capacitor assemblies.

Next you'll need to clean the base. Notice that the terminals are aluminum that are crimped. Using a pin vise with a 1/16" diameter drill bit, start a hole centered in each terminal. Once you have a centered hole switch to a hand drill and drill the 1/16" hole down into the terminal about 1/4". See photo 1. The left base terminals are drilled. The right base terminals aren't drilled.

Build your capacitor assembly with two 33uf on top and one 33uf on the bottom. Use sleeving to insulate the leads. See photo 2.

Insert the capacitor assembly leads into the correct terminals. Pin 1 is common negative and Pins 3,5 & 7 are + 33uf. Check assembly to make sure that the can will easily fit over the assembly and mates with the base. Remove the can and crimp the leads in the terminals using fairly heavy needle nose pliers. These aluminum terminals are very soft and don't require a large tool for crimping. See photo 3.

Test the capacitor assembly for value before proceeding further. Make sure the terminal connections are correct and capacitor value is correct. Make sure the terminal crimp connections are tight and are holding the leads tightly. Test by pulling the leads with needle nose pliers - don't pull like you're trying to pull them out, just test that the crimp joint is tightly holding the lead.  >>>

2

3

 >>> Cut a piece of heavy paper and form into a tube about 1.5" tall. This is going to hold most of the epoxy so there is something for the epoxy to bind to. Mix a batch of 5 minute Epoxy.

Coat the heavy paper tube and coat the inside of the base then fit the tube in place. Coat the inside of the top can and slide it into place over the tube. Make sure the scribe lines match. Wipe off any excess Epoxy from the outside of the can. Use masking tape to secure the two parts of the can together. Let the Epoxy set up for at least one hour before removing the tape.

I either paint the joint with silver paint or wrap the joint with aluminum tape to hide it. See photo 4. The cap on the left has paint over aluminum tape. Cap on right is just paint.

Test cap assembly again for value and then it is ready to install.

This particular description is for the triple 33uf cap which is the most difficult to rebuild but the dual 47uf is rebuilt in the same manner. The dual 47uf cap can have the two caps side-by-side and they will fit into the top can that way. Just be sure of the terminal connections - Pin 1 is common negative and Pins 3 & 5 are + 47uf. Pin 7 is not connected to anything.

4


Checking Out the Power Supply Module

Since the filter capacitors and the 0A2 voltage regulator circuit is located on the Audio module, there's very few parts of the power supply located on the Power Supply module. Usually all that is required is a general clean-up. Check to be sure that the transformer is set for the proper AC input voltage. The primary voltage setting is accomplished by how the wires are connected on the terminal strip under the chassis. You should clean the tube sockets and check the condition of the 26Z5 rectifier tubes. Check the condition of the Amphenol connector and make sure that the pins don't have any corrosion. See photo to the right.

Many restorers change the 26Z5 tubes to solid-state because of the expense of a set of tubes. The military did this a lot and had no problems because the receivers were basically turned on and left on - no cycling of full B+ on tubes with the cathodes cold. Some restorers install an in-rush current limiter device to "soft start" the power supply. It's a decision that needs some consideration. Original 26Z5 tubes are somewhat expensive but very reliable. Going solid-state requires a few small modifications.
 

Continuous Operation? - If you decide that you're going to leave the receiver on continuously, consider this,...if you use your R-390A for an hour a day that will equal seven hours per week. Left on continuously for one week, the receiver will have 168 hours on it, 161 hours that were essentially non-productive. In one year, you'll have put 8,736 hours on your R-390A's tubes and other components and only used it for 365 hours. Although tube heaters don't like to be cycled and cycling does affect their total hours of usability, even if cycling the power on and off reduces the tube's life by one-half, you'll still get more usable hours by turning the receiver off when it's not being used.

photo right: This is a Collins-built R-390A Power Supply showing that there are very few parts used in this module. It still needs to be cleaned and given a thorough inspection.


Setting up the PTO


photo above: A Collins version R-390A PTO.  Note that to the left of Z-702 is hex head slotted plug that covers the end-point error adjustment L-701. Look just to the right of the hex stand-off  that supports the front sheet metal mount and you'll see the slotted hex head of the plug. To access this plug for removal does require the PTO be dismounted. It's then reinstalled without the plug so the end-point adjustment can be made with the PTO installed in the receiver. This requires a long, fairly thin screwdriver to accomplish. (see text below.)

70H-12 PTO Details - Why is the R-390A PTO so large? Actually, when looking at the PTO you are seeing the outermost shield-can. When this shield-can is removed, underneath you'll find the thermostatically-controlled oven which is also mounted within a metal shield-can (along with being wrapped in fiberglass insulation.) If the oven assembly is removed, you'll find another shield-can. This shield-can actually is held in place with internal rubber gaskets to seal the chamber because it was originally filled with dry nitrogen to pressurize the PTO chamber to keep out moisture. If this shield-can is removed, then you will then see the actual PTO. The coil's ferrite core has a threaded rod at the rear of the core. (The following describes the Cosmos PTO) This rod is threaded through a rear guide assembly that has an arm that projects to the side and has two contacts that "ride" on a square "rail" as the core moves in or out of the coil. This guide-arm assembly has three adjustment screws that can determine slightly how the core moves within the coil. There are access holes for adjustment of these screws on the rear plate of the PTO. Also, inside the PTO are usually a couple of desiccant packs to absorb any moisture within the chamber. The end-point inductor L-701 actually consists of two adjustable inductors connected in series. The larger coil is accessed from the front of the PTO and is located under the large hex head plug on Collins' PTOs and under the large slotted (sometimes a Philips) screw on Cosmos PTOs. Z-702 is the output transformer that is basically for impedance matching and isolation. The power input receptacle is provided with 6.3vac tube heater voltage that is actually derived from 25vac dropped thru the BFO tube heater and the 3TF7 ballast tube. The screen voltage is +150vdc regulated and the plate voltage (thru Z-702) is the RF/IF B+ line. Chassis ground and oven voltages are also supplied to the PTO via this receptacle. The output of the PTO is via the coaxial cable.

As mentioned, there are two basic types of PTOs used in the R-390A. The Collins PTO is the older of the two types. The Collins PTO is found on the receivers built in the 1950s. Collins and Dubrow used a stack of washers that are compressed and allow an arm connected to the core lead screw to ride on the edge of the stack. The washers can be moved in the stack to adjust how the arm displaces the lead screw to compensate for linearity. These require a special jig or infinite patience to adjust for any linearity problems. Later receivers will be equipped with a PTO built by Cosmos Industries. Cosmos uses the square rod and arm adjustment that seems easier to work with. There are some other PTOs that are sometimes encountered. Progressitron Corporation supplied some PTOs that are similar to the Cosmos type and are considered to be one of the best types. As mentioned, Dubrow is an early type sometimes encountered and it's similar in design to the Collins. Rebuilt PTOs will be found tagged by Tobyhannah Army Depot (the one I used was excellent) and also Raytheon.


photo above: Cosmos PTO. The access plug now has a slotted screw type head.  It's difficult to see in the photo but it's just behind Z702 and slightly to the right of the hex standoff - basically the same location as the Collins PTO but a much smaller screw plug.

PTO Removal - A little care in removing the PTO will save you a lot of work later. First, set the KILOCYCLE tuning to XX.000, it doesn't matter where the MEGACYCLE tuning is set but the KILOCYCLE setting must be at XX.000 (not XX+000, see note below.) Next, disconnect the PTO output cable from the RF module and unplug the power cable at the PTO. Loosen the captive screws in the front of the PTO. Now, pull back on the PTO body until the oldham coupler center piece comes off of the gear box-side coupler face. Now lift out the PTO. Be careful to not move the tuning shaft of the PTO now. It is set for XX.000 and you should pay attention to the orientation of the oldham coupler or you can mark the shaft so you know the proper setting. If no work is going to be done to the PTO, when reassembling the R-390A you merely have to assure that the PTO is still set to XX.000 and that the gear box and Veeder-Root counter are set for XX.000 when the oldham coupler is assembled. In this manner, the mechanical settings have been maintained and calibration should be very close. NOTE: - XX+000 is the highest frequency tuned on a specific band and XX.000 is the lowest frequency tuned on a specific band. All of the settings here are at the lowest tuned KILOCYCLE frequency on any of the MEGACYCLE settings.
Synchronizing the PTO to the RF Module (if you didn't do the "pre-set" part first) - If you've pulled the RF module without setting the Veeder-Root counter to XX.000, or if you had to do some work on the PTO, or if the PTO shaft has been moved and you don't know where it needs to be, or if you just want to be sure that the PTO is correctly aligned with the RF module then you'll have to synchronize the PTO. This requires a digital frequency counter (DFC.) The PTO should output a specific frequency range, 3.455 mc to 2.455 mc, in ten turns. All that is necessary is to monitor the frequency output of the PTO and set it to 3.455 mc. This frequency will be equivalent to XX.000 on the Veeder-Root counter. Here's the procedure,...

If the Veeder-Root counter wasn't set to XX.000 before removing the RF module, then the PTO was not pre-set to 3.455mc. This is a minor inconvenience that requires the PTO be set by powering up the R-390A and measuring the frequency out of the PTO with a digital frequency counter. It is assumed now that the PTO was out of the receiver so the oldham coupler is not together. Connect the PTO to the power plug in the PTO bay. Then route the PTO output coaxial cable to the back panel IF output connector. Disconnect the IF output cable and install the PTO output cable in its place. This provides you with a BNC connection for the PTO output that is then connected to the digital frequency counter. It isn't necessary to have the PTO mounted at this point but it will have to be in the PTO bay because of the cable lengths. With the R-390A powered up, the PTO will show the output frequency on the counter in about 30 seconds or so. Now rotate the PTO coupler and adjust the frequency to 3.455mc as measured on the DFC. Be sure the R-390A Veeder-Root counter is set to XX.000. Now the two faces of the oldham coupler should be correctly aligned (one projection oriented 90 degrees difference from the other face's projection.) Install the center piece. If necessary, you can loosen the clamp on the Oldham coupler on the gearbox side. Be sure you have the DIAL LOCK on so the dial setting doesn't move. You can rotate the one coupler now to engage the center piece slot. Make sure the PTO side doesn't move. This may require moving the PTO body around a bit to get the two faces and the center piece to fit together. Once they fit, tighten the coupler clamp if it was loosened, then go ahead and tighten the three captive screws to remount the PTO. Fit the backlash spring to the pins on the two coupler faces. Now, loosen the DIAL LOCK and test that the PTO output frequency is 3.455mc at XX.000 and is 2.455mc at XX+000. If a slight correction is needed, loosen the gearbox side coupler clamp to slightly move the PTO side to the correct frequency and then retighten the clamp. Power off the R-390A and reconnect the PTO output cable to the RF module and the IF module's IF output cable to the IF output connector.  NOTE: Once you've done this PTO synchronizing several times you'll get to the point where it becomes very quick and easy. It's actually better and more accurate than relying on the straight mechanical operation of "remove, don't touch, reinstall" procedure.

End-Point Error Adjustment - Collins PTO - It's rare to find an R-390A PTO that has excessive end-point error that is beyond adjustment. Most of the End-Point Error (EPE) horror stories come from the 70E-15 PTO that was used in the R-388 receiver. The R-390A PTO used high quality material for the ferrite core and consequently stability is maintained of a period of decades. This applies to both Collins-built PTOs and to the Cosmos-built PTOs. Most of the time just a slight "touch-up" is all that is necessary and luckily that can be accomplished without a test jig or with having to operate the PTO outside of the receiver (as you do with the R-388 receivers.) The TM manuals direct you to remove the PTO and remove the access plug for access to the adjustable compensation inductor. While you have the plug removed and the PTO in your hand, look carefully at the adjustment screw to see its position within the hole. Then go ahead and reinstall the PTO. Dismount the front panel (lower it down) for access through the holes in the KC tuning lock plate and the front and rear gearbox plates back to the PTO compensation inductor adjustment. You'll need a long, thin small blade screw driver for this procedure. The first step is to check your EPE and see what it is. Usually, it will be pretty close. The greatest excursion I've found on a Collins-type was around 4.0kc. Most EPE encountered are around 1 or 2 kc. The TM manual will give examples of which way to turn the EPE compensation inductor based on whether the ten-turn coverage is greater than or less than 1.000MC. Make a small adjustment to the EPE compensation L and then return the R-390A to XX.000 on the Veeder-Root counter. With the CAL on, loosen the oldham coupler on the gearbox side and readjust the PTO shaft for zero beat. Retighten the gearbox side oldham coupler and recheck your EPE. If you've adjusted the compensation L in the correct direction your EPE should be less. Repeat the procedure until you've gotten the EPE to less than 500 cycles. You can adjust it even closer if you want to since the "tic-marks" on the Veeder-Root counter are for 200 cycles. When you're satisfied with the EPE, remove the PTO from the receiver and install the threaded plug that covers the access to the compensation inductor adjustment. Remount the front panel. Pretty easy when compared to the hassle of doing a 70E-15 PTO from an R-388.

EPE Adjustment - Cosmos PTO - The Cosmos PTO has two screws in the recessed front of the PTO. The large screw in the center (sometimes a Philips) doesn't need to be removed. To the right of the large screw is a smaller screw that is somewhat difficult to access because of Z702. Once the smaller screw is removed, you'll see a small blade-slot trimmer adjustment that is the inductance adjustment for L-701. The screw driver used has to be a very thin blade type. If you do the adjustment on a jig like I do then the screw driver can be fairly short to allow access without removing the PTO from the jig. If you're taking the PTO out of the receiver to adjust L-701 then use a slightly longer screw driver. Because the L701 adjustment is so difficult to access because of Z702 it's almost impossible to do the EPE adjustment as described in the manual procedure (dropping the front panel and accessing the PTO through a hole in the gearbox plate.) I used to take the PTO out of the receiver, make the EPE adjustment and then reinstall to test the EPE adjustment. This takes a bit longer with this method but the adjustment screw is so small and thin it's very difficult to access by any other method. Also, with the PTO-out method, the screw driver used doesn't have to be so long (but it still has to be very thin.) Nowadays, I use the PTO jig which makes the whole EPE adjustment easy. Other than these minor differences, the Cosmos PTO is virtually the same as the Collins PTO. Both PTO types are interchangeable.

Linearity - Check each 100kc point with the 1.0mc range of the PTO. Each 100kc should come up exactly X.X55mc, e.g., 2.455mc at XX+000, then 2.555mc at XX.900, etc., down to 3.455mc at XX.000. A minimal EPE will usually assure the best linear tracking. But, this assumes that the original linearity set up was a good one (and that it hasn't mechanically changed) and the slight drift of the tracking can be compensated for with adjustment of L701. Of course, no PTO has exactly perfect linearity but any excursion shouldn't be greater than the EPE, that is, the more accurate you set the EPE, the less linearity problems you'll usually have. I've tested many PTOs that have an EPE that's really pretty good but at the center to the range the linearity changes to maybe up to 2kc or more off. Generally, these types of linearity errors will raise and fall in a gentle curve with the greatest error at the center of the range. If you only looked at the EPE, you'd think the PTO was a really good one but the linearity error would be causing tracking errors at the center of each tuning range. It's worth a try to "over-correct" on the EPE adjustment to see if the errors might "even-out" and end up with an overall decent tracking PTO. If that doesn't work then something has probably happened to the mechanical adjustments inside the PTO.

It's difficult to correct excessive linearity errors. Early PTOs from Collins have a compressed washer stack that allows moving the height of individual washers to direct the elevation of an extension arm that controls the movement of the ferrite core. It's time consuming work and easily can end up causing more problems than initially existed. But, it can be done and it's easy to see what you're trying to accomplish. With the Cosmos PTO, it's a mystery how the linearity is adjusted. It appears that the three screws at the back of the ferrite core mount can be adjusted to affect the linearity arm's position but it also appears that by slightly bending the arm extensions where they ride on the square rod might accomplish something. But, exactly where and how to adjust the linearity on a Cosmos, to me anyway, is a mystery.

Unfortunately, the military manuals don't cover anything for working on the R-390A PTOs. There's information on the Internet but how successful the procedures are is unknown.

PTO Fixture - W6MIT gave me the PTO fixture shown to the right. John built it on a piece of aluminum extrusion with tapped holes for the captive screws in the front and a spacer to support the rear of the test-PTO. The turns counter is coupled to the test-PTO with a bellows-type flex coupler. The turns counter allows quick movement for the ten-turn range. Extreme accuracy requires watching the disk and pointer. Voltages are applied to P-109 and the coax cable output is routed to a digital frequency counter. Using the fixture eases the problems of  lowering the front panel and accessing L-701 to adjust EPE. Just remove the PTO, set it up on the fixture, adjust the EPE and reinstall the PTO into the receiver.   NOTE: I've found that it's very easy to stick a small piece of blue masking tape on the disk and mark a centerline with a pen. Each time L701 is adjusted for the EPE, the position of the 00+000 or 2.455mc changes. The tape is an easy way to change the mechanical zero reference point. Before, I had to loosen the set screw on the bellows to correct. The blue masking tape is really much, much easier.


photo right: A test fixture for working on the PTO out of the receiver. The voltages required are +195vdc, +150vdc and 6.3vac. The turns counter makes it easy to keep track of the ten turn span of the PTO range. The turns counter can help keep track as you progress on reducing end-point error but it isn't accurate enough for < 1kc EPE. The disk and pointer are for extreme accuracy (< 1kc EPE.) The disk has a fine wire pointer and is marked off in one quarter turn divisions.

Note that the PTO on the fixture is actually from a R-725 receiver since the PTO has a ferrous metal shield installed. Also, the R-725 PTO requires a jump from pin C to ground to apply filament voltage to the VFO tube.


Inside the PTO - Most R-390A PTOs function quite well and with a little "touch-up" EPE adjustment, they will be well-within specifications. However, sometimes we encounter a non-functional PTO or an EPE/linearity problem that might have you thinking that you should get inside the PTO. This is not a particularly easy task as there are several shields to remove first.

With the PTO out of the receiver first remove the mounting bracket on the rear of the can. Next, remove the three screws at the front of the can (removing the rear mounting bracket also removed the two rear can screws.) Slide the can cover off. Now, you'll see a fiberglass-wrapped can shield. This is the PTO oven. Some PTOs have the fiberglass wrapped with cord to secure it. Others had the fiberglass wrapped upon itself to have it stay in place. It's not necessary to remove the fiberglass. You'll have to unsolder the two wires to the oven element. It's also necessary to unsolder the other two wires to the oven thermostat. Then remove the three mounting screws at the front of the oven-can and slide the oven off. Now there's one more shield-can to remove. By removing the oven mounting screws, now this last shield is only held in place by the two O-ring gaskets inside. It's a tight fit but by twisting the can and pulling, it will come off. This then reveals the inside of the PTO.

Once inside, you'll see that L-701 is actually two inductors connected in series. The larger one is for adjusting the EPE. You'll also see the threaded rear mount assembly for the ferrite core. There are three screws that slightly change the exit position of the threaded rod and core as it exits the coil. These screws can be accessed thru three holes in the rear plate. Turning these screws can somewhat adjust the linearity since the position of the core changes slightly. But, what screw changes the linearity in what direction? I tried a few adjustments but I couldn't see any change. Since I didn't know what I was doing I guess these results are to be expected.   

There are a lot of things about the Collins' or the Cosmos PTO design that aren't in any of the R-390A manuals. Even the schematic of the PTO doesn't show some of the component details. Obviously, when Collins or Cosmos adjusted the PTOs, they had a jig that was set up for an easy procedure to adjust the performance of the PTO. The jig probably involved using a special shield that had access holes for all of the adjustments when installed. Note the large holes in the rear plate to access L-701 from the rear. I can't imagine that the calibration technician had to make an adjustment to the internal screws, then reinstall the shield, check the linearity, remove the shield, adjust, reinstall shield, etc., until the PTO was linear. Without a jig and a shield with holes that's what has to be done. Without knowing what particular screws (or washers for Collins) skew the linearity which way, it's just guess work and that will result in a laborious process that's likely not going to be successful. The front access to L-701 is what Collins provided and that's what should be used for any and all adjustments to the PTO.

I've only run across one PTO that had moderate non-linearity problems and one other PTO that was non-functional in a standard R-390A receiver. All other PTOs, either Collins or Cosmos, have always functioned and the EPE was always adjustable to < .5kc. The 70H-12 PTO is so easy to find and most are pretty cheap, so why spend a lot of time on a non-linear one when you can buy another one that will probably work fine?

As for details on the problem PTOs,...the non-functional PTO was from a R-725 version receiver. These PTOs have the tube heater chassis connection external to the PTO and therefore won't work in a standard R-390A. The PTO would be easy to modify,...but then it wouldn't function correctly in the R-725 receiver. The non-linear PTO was a Cosmos type which I couldn't get to adjust but it's still usable. It's somewhat out of spec but, using the CAL abilities of the R-390A, one can still get to 1kc accuracy within a span of a couple hundred kilocycles which is not too bad. But, as mentioned before, just get a different PTO if you have linearity problems.

Just in case you're curious but you don't want to have to disassemble your Cosmos PTO to see what's in there,...see photo right. 


photo above: Cosmos PTO inside. Note three adjustment screws on core rear assembly and how the arm rides on both sides of the square rail to the left. Note the two L-701 inductors connected in series.


Front Panel Restoration

End-user Panel Repaints - The R-390A specifications state that the front panel is to painted medium gray. The manuals give a specific part number for the paint but it seems the shade of gray did change over the years from contractor to contractor. Also, after fifty+ years on the planet, most of the original paint on the panels will have faded somewhat. When choosing the color for repaint, try to get as close as you can to your receiver's original panel color by having the original paint matched at an professional automotive paint supplier. Use the back of the panel for matching since it's probably the least faded. Only use automotive quality paint for repainting the front panel. Nearly all R-390A panels are found painted gray, however, sometimes the end-users did repaint the front panels totally non-specification colors. Very light gray with black filled nomenclature panels are fairly common. Admiralty Grey, a light green color used on the RACAL RA-17 receivers, has been reportedly used on some R-390A receivers (with black nomenclature.) There were banks of R-390A receivers at Clark Air Base in the Philippines that had black panels that were actually a black grained and anodized finish. Once in a while, olive drab panels turn up, supposedly painted that way by the USMC (see photo right.) At any rate, there's ample evidence that R-390As were painted colors other than gray when the end-users had some reason to do so. Remember, all R-390A receivers left the contractor's facility with gray panels (and that's original) but it can be considered "acceptable" to paint the R-390A panels colors other than gray if there is believable evidence that the color was actually used on a receiver that was operating in a commercial or military capacity. For example, the black panel R-390As were used at Clark AB and there is photographic evidence to prove it.

Silk-screened Panels - All Collins and Motorola R-390A receivers use front panels that have silk-screened nomenclature. This presents a problem if the panel is in rough condition. About the only solution is to look for a decent condition replacement panel. If originality isn't an issue, a silk-screened panel can be replaced with an engraved panel. Be aware though, that most Collins and all of the other contractors used a short serial number tag with the exception of Motorola. The Motorola contracts used a 3" long tag with different locations for the mounting holes. If you're trying to maintain originality with a Motorola contract R-390A, then you're going to have to find another Motorola front panel. (NOTE: Early contract Collins R-390A receivers also use the long 3" data tag.)

Engraved Panels - Repainting an engraved front panel is very easy. Be sure to mask the back of the panel (if you're going to paint it) where the panel mounts to the Main Frame and also a small area by the upper left mounting screw for the Carrier Level meter. Most panels will have nomenclature on the backside of the panel that identifies some of the components. Be sure to use automotive grade paint that is purchased from an automotive paint dealer. This type of paint will have special hardeners that make the paint really durable. Also, professional-quality paint will dry "ultra-thin, hard and flat" which will help make filling the engraving a lot easier. After painting, let the panel dry at least overnight before doing the engraving fill. 

Engraving Fill - I use Artist's Acrylic paint to match the engraving fill paint. If you use pure white it will look way too bright. You should mix a color that is close to that found on manila folders - kind of beige color. Apply the fill paint to only one control nomenclature section at a time. Use a small paint brush and dab the paint into the engraving. Don't try to just paint into the engraving - you have to dab the paint into the engraving to have enough there and, of course, you'll have some paint around the engraving - that's normal. Let the fill paint set for about one minute. You'll now have to remove the excess paint around the area. Use a dampened paper towel folded very flat to remove the excess remaining paint on the panel. You'll have to be careful not to "pull" the fill paint out of the engraved area, so keep the paper towel pieces small and only use them once. You'll have to have several damp paper towel pieces ready as you do each area on the front panel. Also, I've found that if you dampen the paper towel pieces using Glass Plus instead of water the Artist's Acrylic comes off much cleaner. These paper towel pieces should be just damp - not wet! Generally, you'll have to do each engraved nomenclature section twice to get a good fill. Let the first coat dry for about five minutes before applying the second coat. When finished let the panel dry overnight. The next day you can apply carnauba wax to protect the panel and the engraving fill which will enhance the overall panel appearance.

IMPORTANT NOTE: Don't use Windex to dampen the paper towel pieces. Windex contains ammonia which might damage the new panel paint. Glass Plus doesn't contain ammonia but works very well to remove the excess paint without damaging the panel paint.

The Back of the Front Panel - The backside of the front panel has several clamps for holding the harness in place. Also, there is a printed circuit board mounted on the back of the front panel just above the frequency readout bezel. There is a lot of mechanical stress on the various wires when the front panel is lowered so check all of the wires to the pots and switches for any breaks or other problems. Since you have removed the front panel for repainting (or replacement,) then you'll be remounting all of the pots and switches along with the phone jack, dial lock and the zero adjuster. Note also that there is a grounding lug on the upper left (as seen from the front) stud of the CARRIER LEVEL meter. This provides a chassis connection for one of the AGC delay capacitors.


photo above: 1961 R-390A Capehart contract receivers with Olive Drab panels were sometimes the product of a repaint by the USMC
but, in this case, I built-up this recreation of the USMC Capehart R-390A, originally in 2010. It has recently (2022) undergone a complete rebuild for top performance from the "all Capehart" modules (more details in Part 3.)

Mounting the Front Panel to the Main Frame - When mounting the front panel, note that the Dial Lock has to fit over the KC tuning shaft lock-plate. Leave the Dial Lock loosely mounted so it can be rotated to clear the lock-plate. Once the front panel is mounted, you can rotate the Dial Lock into position (the locking grips on each side of the locking plate with the locating tab in the hole one the backside of the front panel) and tighten the mounting nut.

If you have the two large shaft bushings (KC and MC Tuning) and the three small shaft bushings mounted to the front panel you'll find it difficult to guide the shafts thru the bushings because of the harness length. Although you could dismount the harness clamps, it's easier to just plan ahead and slide the rear panel shaft bushing onto the shafts and then mount the front panel to the Main Frame. You'll find with the large openings, it's really easy to guide the front panel over the shafts with the harness clamps tightly mounted. Once the front panel is mounted, then slide the rear bushing forward and slide on the washer and thread on the front bushing.

Once everything is mounted to the front panel and the front panel is fully mounted to the Main Frame (and tightened,) then you can go ahead and adjust the panel shaft bushings for the best feel when rotating the controls.

Front Panel Bearing Adjustment - If you want your R-390A to tune "light and easy" then you're going to have to adjust the front panel feed-thru bearings. These are on the KILOCYCLE and MEGACYCLE tuning shafts.

After a thorough cleaning of the RF module gear box, you probably noticed that the KILOCYCLE tuning was very light and easy to manipulate. As you reinstalled the slug racks, the tuning became slightly more difficult to manipulate but was still very light and easy. When the front panel was installed, all of a sudden the tuning seemed to drag and was noticeably more difficult to manipulate. This is caused by the two panel feed-thru bearings. When the RF module is removed and then reinstalled, it's very slightly, differently oriented and the same goes for the front panel. Only a slight misalignment of the panel bearings will cause a "heavy-feel" to the tuning.

Before the front panel is reinstalled, slide the rear bushing onto each shaft. Fit the front panel into position over the shafts and begin installing the mounting screws. With all of the screws tightened that secure the RF module to the Main Frame and all of the screws tightened that secure the front panel, then slide the rear bushings forward and mount the washer and front bushing nut. Note how the bearings can be moved within the feed-thru mounting hole. This is to allow proper placement of the bushing to act as a guide and bearing for each shaft.

Using a 5/8"open-end wrench, lightly tighten the KILOCYCLE bearing nut being careful to not move the position of the bearing itself. Then try the KILOCYCLE tuning. If the tuning is very light then try to just slightly tighten the bearing a bit more - not too much - the bearings don't have to be mounted "super-tight." If the tuning is still light then the adjustment is fine. Usually, no matter how the bearing is adjusted, there will be a slight increase in the "drag" because of the bearing itself. The adjustment is to achieve the lightest "feel" while still providing support for the shafts.

Do the same procedure for the MEGACYCLE tuning although this tuning is much more difficult anyway since you're moving so many of the slug-racks and there's also a detent about every turn of the shaft. Adjust this bearing for the best "feel." You can also apply a drop of machine oil on the shafts to help lubricate the oil-lite bronze bearing that is inside each of the feed-thru bearings.

The end result will be a KILOCYCLE tuning that is very easy to manipulate and feels great when fine tuning is required.

The three small (.25" shaft) bushings are adjusted in the same manner (ANT TRIM, BANDWIDTH, BFO.)

Use the Correct Lock Washers - Each nut that secures a potentiometer or switch should have a internal tooth lock washer installed. There are five 6-32 flat head phillips screws that mount into the Main Frame bed and into one of the vertical dividers (into pem-nuts) on the underside of the bed. These screws each have a #6 conical external tooth lock washer installed. If you're missing the conical lock washers, they are available from McMaster-Carr (boxes of 100 - they're cheap.) Notice that the three 6-32 flat head phillips head screws that mount the cable clamps have split ring washers mounted on the back side of the clamps (along with nuts.) The eight 10-32 flat-head screws that mount the panel to the main frame vertically will thread into Nylock pem-nuts, so no lock washers are required.

RADIATION - CARRIER LEVEL and LINE LEVEL meters - If a R-390A receiver has ever been through a military decommissioning, a surplus house or other "official-type" of handler, both meters will most likely have been removed. There was (is) a concern that the radium-phosphor mix that coated the scale and needle represented too much of a long-term radiation source and that was a cause for meter removal and its "proper" disposal. It wasn't necessarily a concern over a single receiver's meter set but, collectively, many receivers being stored together represented a fairly large amount of radium in one area that was going to be radioactive for centuries (radium's half-life is 1600 years.)

Whether or not the radiation level from the two meters on a single receiver is anything to be concerned about is up to the individual user/owner to research and decide. Since the meters are about the same size as an old style radium dial wrist watch a comparison might be interesting. Most data available on radium watch dials seems to indicate that a 1 year exposure by wearing that type of watch was equivalent to ONE coast to coast flight on an jet airliner (24 mSv.)

If you want to get inside one of the original type meters - DON'T EVEN TRY! It's a difficult operation that usually ends up ruining the meter. Special tools are necessary and one should wear protective gloves. When proper original type meters are found (taken from parts sets apparently) they will likely be in "rough" condition. Sometimes it's difficult to remove the outer metal cover, so rather than damage the meter further, just refinish the metal cover in place. It's easy to mask the glass and give the cover a light coat of flat black paint. If there are heavy scratches or gouges, these will have to be removed with either a file or Al-Ox paper followed by a paint job. I've also "touched up" the meter covers and then used 0000 steel wool applied "lightly" to even out the finish. Be sure to use the gaskets (if you have them) between the meter body and the front panel.

If you're contemplating changing the scales to something non-radioactive, this would probably create more of a "radiation problem" since now the scale with the radium is out in the open. How do you dispose of it? It's better to just leave the meter "sealed." Most R-390A owners feel that the meters are safe when installed in the receiver. At a distance of three inches the meter's radiation leakage is just barely measurable. It's the phosphor material that "glows" in the phosphor-radium mix with radium providing the energy. However, the phosphor "glow" is depleted fairly rapidly (usually a few decades but it can happen very quickly if the meter scale is exposed to constant sunlight.) Be aware that a non-glowing meter is still radioactive since radium's half-life is several centuries.


A Phosphor-material mix "glows" and Radium provides the energy

Grab Handles - These are made out of stainless steel and can be easily cleaned up with 0000 steel wool and a small brass brush for the washers and the flanges. Wash with Glass Plus before installing.

Dial Cover - This cover, unfortunately, takes a lot of "hits" and as a result is sometimes found dented, scratched or both. Inside the cover is painted with zinc-chromate primer which is bright yellow-green color. Usually the inside is okay but if the cover has dents to be removed, it might need repainting after the body work is finished. Outside the cover is semi-gloss black. Automotive-quality paint should be used for painting the exterior of the cover. NOTE: Minor defects can be touched-up with black lacquer.

Knobs - The knobs also take a beating and many times will need to be restored. First strip the old paint off with a high-quality stripper. Go over the knobs with a wire brush afterwards. Use a high-quality automotive paint in semi-gloss black. Let the paint set overnight. Mix "manila" Artist's Acrylic as described above for front panel nomenclature fill and use the same procedure to add the index line for the knobs. Let this set up for a day and then give the knobs a coat of carnuba wax and install. NOTE: I've found that many times the knobs can be "touched-up" with good results. I use black lacquer paint. I sand the paint chips a little and then dab the lacquer into the chip. As the lacquer dries, it will shrink and become level with the rest of the paint. Inspection of "original" knobs usually will show this method was used in the depots for minor defects.

Tubes - I can't emphasize enough that it's very important that ALL of tubes that are installed in a newly rebuilt R-390A are either NOS or are in "used-tests as new" condition. For the receiver to operate at its full capabilities ALL of the tubes have to be in "as new" condition. As found, nearly ALL R-390As that I've reconditioned had a very weak RF amplifier 6DC6. All three 6C4 oscillator tubes always seem to be very weak and I've found on all R-390A receivers that even if the 6C4 tubes are somewhat over the minimum acceptable, they still will adversely affect performance. The 6C4 tubes should be NOS or test as "used-tests as new" condition. About 25% down from new specs is the actual minimum acceptable (the receiver will function with marginal 6C4 tubes but the range of RF Gain adjustability is greatly reduced and audio modulation on AM-SW BC stations isn't reproduced to its fullest.) The 6AK6 tubes in the AF module also seem to commonly be found in very weak condition. The two 5654/6AK5 tubes also seem to be found weak fairly often. The two rectifier tubes 26Z5 usually test marginal (it's just an emission test for rectifiers.) The 5749/6BA6 tubes seem to last quite a long time (lots of them in the IF module) and the PTO tube is rarely bad. Also, the 5814A/12AU7 tubes (seven used in the receiver) seem to have a long life. BUT, test ALL of the tubes and only use ones that test as "NOS" or "used-tests as new" and definitely replace any weak or marginal tubes. As I've implied, the R-390A will function with marginal tubes and seem to be working okay,...but, with NOS tubes, the reconditioned and aligned R-390A will become a tremendous performer.

Tube Testers - The military TV-7 is a compact and easy to use gm-type tester but it's not the only good tube tester out there. Unfortunately, the TV-7 has become very, very, very expensive these days thanks to audiophiles and tube collector/eBay sellers. There are several other tube testers that work the same way as the TV-7 to measure the tube's mutual conductance. Most dynamic mutual conductance tube testers will be expensive, but maybe just not as expensive as the TV-7. Many of the TV service industry-type of Hickoks do sell for much less than the TV-7 and use exactly the same circuit. Hickok 600, or the 6000, the Hickok 534 and many others were produced for TV repairmen and these are all gm-type testers that sell for much less than a TV-7. Additionally, these testers mentioned have the option for the user to select "English Scale" with "Good-?-Bad" scaling or the user can select the scaling in mutual conductance (usually 3000gm, 6000gm and 15,000gm full scale ranges.) So, the TV-7 isn't the only tube tester around, there are several good options that are much more reasonably priced.

Reducing "High Line" AC using a Line Bucking Transformer - The R-390A was designed to run on 115vac input voltage. Tube heater voltages and the non-regulated B+ voltage is dependent on 115vac being the line voltage used. Today, line voltages are nearly always minimum 120vac and often run up to nearly 125vac. Short term operation, such as testing or alignment, isn't usually affected by "high line" operation. Long term operation however will affect tube life, initial "turn on" surge might be a problem for the 3TF7 and the higher non-regulated B+ can cause an increase in overall heat generated. It's very easy to add an external Line Bucking Transformer to lower the "high line" down closer to the specified input AC voltage. Using a 6.3vac filament transformer (that was designed for 115vac primary voltage) will lower the AC line by about 7vac to 8vac, e.g., lower a 124vac line down to 116-117vac. Our AC line here in Dayton is close to 124vac (123.8vac measured 7/29/22) and Line Bucking with a 6.3vac filament transformer lowers the AC line to 116vac. For receivers I use 6.3vac rated at about 3A minimum transformers and for medium power transmitters I use 6.3vac at about 8A minimum. It's not critical since the VA is only for the small voltage drop, not the entire VA the equipment requires. You can always use a larger current-rated filament transformer, especially if you want to use it to supply 115vac to a power strip, just be sure to have a primary switch on the bucking transformer. There are lots of easy hook-ups shown on the Internet (search on "line bucking transformer.") Of course, an autotransformer (Variac or Powerstat) could be used just as easily but filament transformers are plentiful and cheap. Variacs are also plentiful, just usually not cheap. Besides, the Variac belongs on the test bench.


CONTINUE TO PART 2


R-390A PART 3                      R-390A PART 4                      Return to Home Index


Radio Boulevard
Western Historic Radio Museum

 Vintage Radio Communication Equipment Rebuilding & Restoration Articles,

 Vintage Radio History and WHRM Radio Photo Galleries

1909 - 1969

- 60 years of Radio Technology -


This website created and maintained by: Henry Rogers - Radio Boulevard, Western Historic Radio Museum © 1997/2025